

0
Owner's of the Honeywell Building Set Bluetooth Ring Scanner gave it a score of 0 out of 5. Here's how the scores stacked up:


8 - 6
Charge Timer
The battery pocket timers are dynamic and based upon the capacity of the battery pack. There is a timeout period for the
soft start and another timeout period for the overall time required to charge the battery to full capacity. The pocket’s LED
flashes red when the charging pocket timeout period has expired.
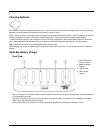
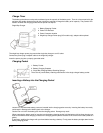
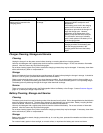
Single Bay Charger
The single-bay charger power plug mounts the single-bay charger to an AC outlet.
Connect the power plug or adapter cable to the single-bay charger.
Insert the power plug into a properly grounded outlet.
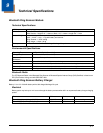
Charging Pocket
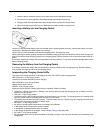
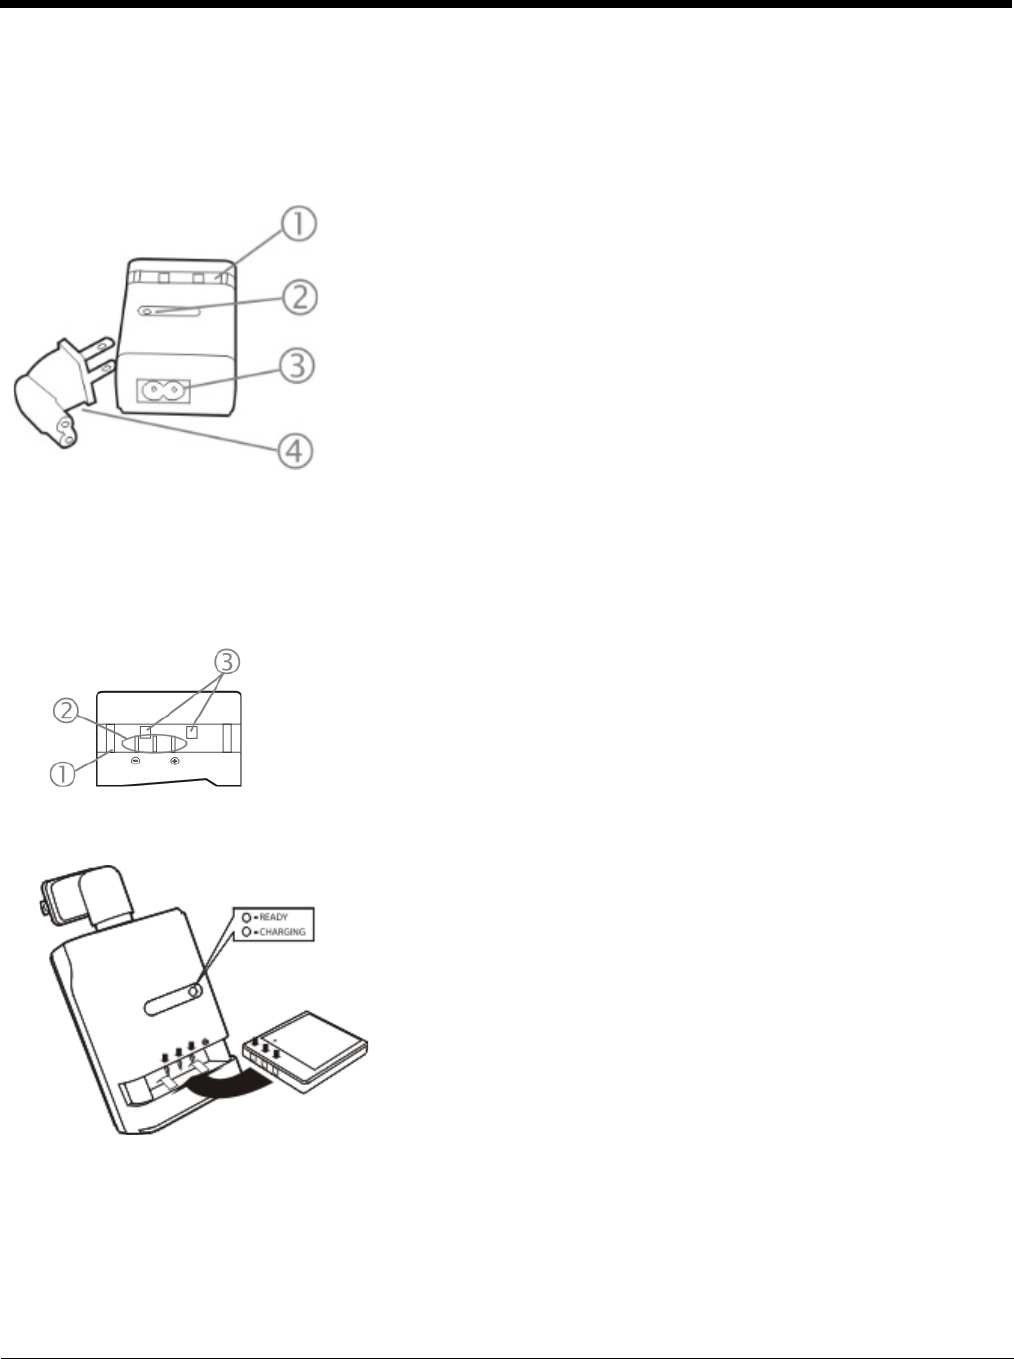
Inserting a Battery into the Charging Pocket
Caution! It is important that battery packs are inserted into the charging pocket correctly. Inserting the battery incorrectly
could result in damage to the battery pack or the charger.
Caution! Do not “slam” the battery pack into the charging pocket. Damage may result.
When preparing the battery pack for insertion into the battery charging pocket, hold the battery with its three charging con-
tacts in line with the three charging contacts in the charging pocket (use the direction of the arrow on the battery label as a
guide).
If necessary, stabilize the charger with your hand before inserting a battery. Firmly press the battery straight down into the
battery charging pocket.
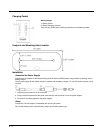
1. Battery Charging Pocket
2. Power LED Indicator
3. Power Connector location
4. Single-bay Charger Power plug (US models only), adapter cable optional.
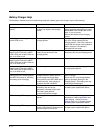
1. Battery Pocket
2. Battery Charging Contacts
3. Single Bay Charging Battery Retaining Springs
There are very small battery retaining mechanisms in the single charger battery pocket.


Find Your Products By Category
- Photography
- Video Game
- Computer Equipment
- TV and Video
- Communications
- Automotive
- Portable Media
- Marine Equipment
- Cell Phone
- Baby
- Home Audio
- Fitness & Sports
- Power Tools
- Household Appliance
- Car Audio and Video
- Personal Care
- Kitchen Appliance
- Lawn and Garden
- Musical Instruments & Equipment
- Laundry Appliance
- Outdoor Cooking
Please Login
