
0
Owner's of the Axis Communications Security Camera Network Camera gave it a score of 0 out of 5. Here's how the scores stacked up:
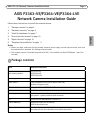


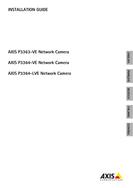
AXIS P33-VE Network Cameras Installation Guide Page 7
ENGLISH
Install the hardware
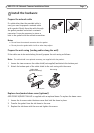
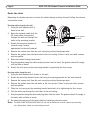
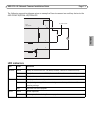
Prepare the network cable
If a cable other than the provided cable is
used, you need to prepare a network cable
with a gasket. Gently force the cable through
the gasket provided and attach a network
connector. It may be necessary to pierce a
hole in the gasket with the resitorx
screwdriver.
Notes:
• Do not force the network connector into the gasket.
• Do not pierce the gasket with a knife or other sharp object.
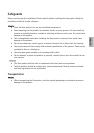
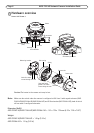
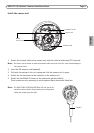
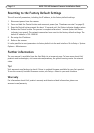
Prepare the unit casing (routing cables along the wall)
If the cables are to be routed along the wall, prepare the unit casing as follows:
Note:
The cable shield is an optional accessory, not supplied with the product.
1. Loosen the two screws on the cable shield (not supplied) and detach the bottom part.
2. Attach the bottom part of the cable shield to the unit casing with the screw.
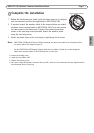
Replace clear/smoked dome cover (optional)
AXIS P3363-VE/AXIS P3364-VE is supplied with an optional dome. To replace the dome cover:
1. Loosen the 4 screws under the dome cover that hold the dome in place.
2. Transfer the gasket from the old dome to the new.
3. Replace the old dome with the new and tighten the screws.
Top part
Bottom part
Cable shield
Unit casing
(optional accessory)


Find Your Products By Category
- Photography
- Video Game
- Computer Equipment
- TV and Video
- Communications
- Automotive
- Portable Media
- Marine Equipment
- Cell Phone
- Baby
- Home Audio
- Fitness & Sports
- Power Tools
- Household Appliance
- Car Audio and Video
- Personal Care
- Kitchen Appliance
- Lawn and Garden
- Musical Instruments & Equipment
- Laundry Appliance
- Outdoor Cooking
Please Login
