
0
Owner's of the Axis Communications Security Camera Network Camera gave it a score of 0 out of 5. Here's how the scores stacked up:


AXIS P33-VE Network Cameras Installation Guide Page 11
ENGLISH
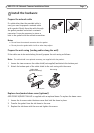
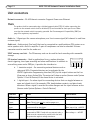
Complete the installation
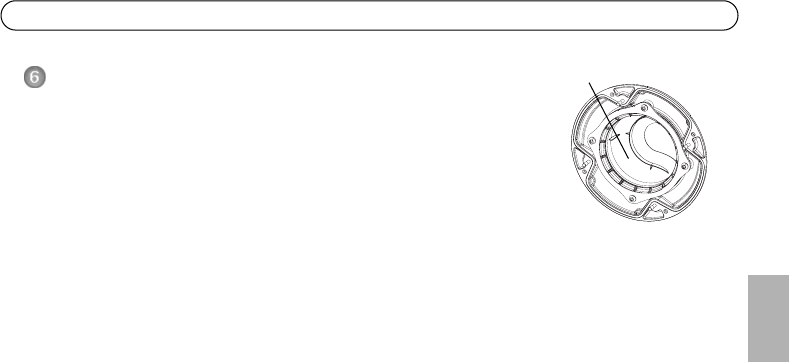
1. Rotate the black protective shield inside the dome cover so it is aligned
with the camera’s position (not applicable to AXIS P3364-LVE).
2. If required, attach the weather shield to the camera before you attach
the dome cover (not applicable to AXIS P3364-LVE). To do this remove
the two screws in the dome cover. Transfer the washers from these
screws to the two long screws provided. Attach the weather shield
using the two long screws.
3. Attach the dome cover to the unit casing by tightening the 4 screws.
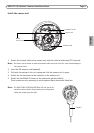
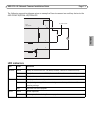
Note:
AXIS P3364-LVE Network Camera: Before attaching the dome cover make sure the optical shield
sits well in place. See image on page 10.
For the AXIS P3364-LVE Network Camera, when the lens holder is tilted at a certain angle the
dome cover may block part of the IR illumination. In that case:
• loosen the locking screw
• rotate the lens holder 180°
• tighten the locking screw
• for correct image orientation, rotate the lens by 180°; make sure the horizontal lines are aligned and the
mark between them is facing up.
Black protective shield


Find Your Products By Category
- Photography
- Video Game
- Computer Equipment
- TV and Video
- Communications
- Automotive
- Portable Media
- Marine Equipment
- Cell Phone
- Baby
- Home Audio
- Fitness & Sports
- Power Tools
- Household Appliance
- Car Audio and Video
- Personal Care
- Kitchen Appliance
- Lawn and Garden
- Musical Instruments & Equipment
- Laundry Appliance
- Outdoor Cooking
Please Login
