
0
Owner's of the Axis Communications Security Camera Network Camera gave it a score of 0 out of 5. Here's how the scores stacked up:


Page 10 AXIS P33-VE Network Cameras Installation Guide
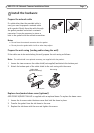
Access the video stream
Use the tools provided on the Installation and Management Software CD to assign an IP address,
set the password and access the video stream. This information is also available from the support
pages on www.axis.com/techsup
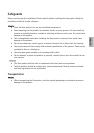
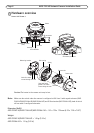
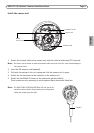
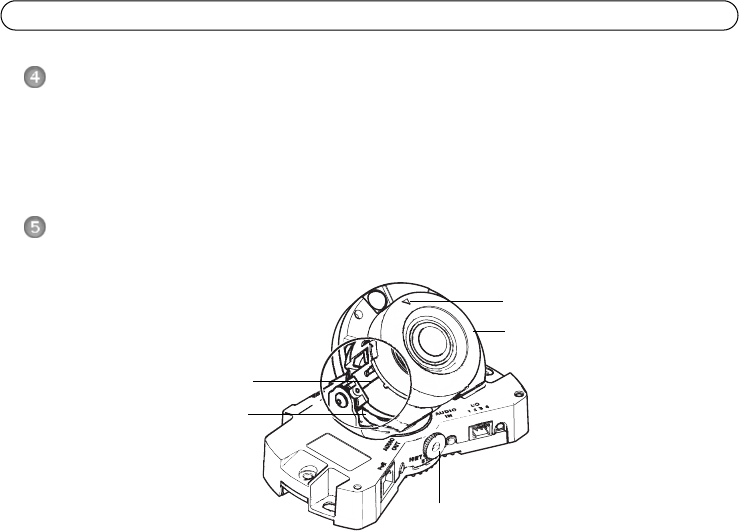
Adjust the Lens
Open the Live View page in the web interface and make the following adjustments to the camera:
1. Loosen the locking screw.
2. Turn the lens holder to the desired position.
3. Turn the lens to make sure the (horizontal) lines on either side of the lens are aligned
horizontally.
Note:
Ensure that the mark on the lens cover, between the horizontal lines, is facing up.
4. Once satisfied, gently tighten the locking screw and to secure the camera’s position.
5. Open the Focus Adjustment page in the Web interface under Setup > Basic Setup > Focus &
Zoom, and follow the on-screen instructions. Use the image window to adjust the focus and
zoom. See the online help files for more information.
Notes:
• Due to the dome’s refraction, the image may appear slightly out of focus once the dome has been placed.
To correct this go to the Focus Adjustment page in the Web interface under Setup > Basic Setup > Focus
& Zoom, and adjust the focus again.
• When the zoom and focus are adjusted, the IR illumination is automatically aligned to the defined angle of
view.
Caution!
Adjusting the focus and zoom manually can damage the lens.
Locking screw
Horizontal line
Mark
Lens holder
Optical shield


Find Your Products By Category
- Photography
- Video Game
- Computer Equipment
- TV and Video
- Communications
- Automotive
- Portable Media
- Marine Equipment
- Cell Phone
- Baby
- Home Audio
- Fitness & Sports
- Power Tools
- Household Appliance
- Car Audio and Video
- Personal Care
- Kitchen Appliance
- Lawn and Garden
- Musical Instruments & Equipment
- Laundry Appliance
- Outdoor Cooking
Please Login
