
0
Owner's of the Axis Communications Security Camera Axis Communications Security Camera gave it a score of 0 out of 5. Here's how the scores stacked up:

Page 8 AXIS P13 Network Camera Series Installation Guide
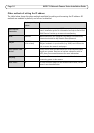
AXIS Camera Management - multiple cameras/large installations
AXIS Camera Management can automatically discover multiple Axis devices, show connection
status, manage firmware upgrades and set IP addresses.
Automatic discovery
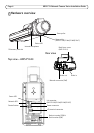
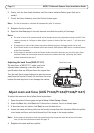
1. Check that the camera is connected to the network and that power has been applied.
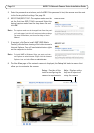
2. Start AXIS Camera Management. When the network camera appears in the window, right-click
the link and select Live View Home Page.
3. See page 9 for instructions on how to set the password.
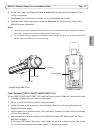
Assign an IP address in a single device
1. Select the network camera in AXIS Camera Management and click
the Assign IP button .
2. Select Assign the following IP address and enter the IP address, the
subnet mask and default router for the device.
3. Click OK.
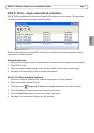
Assign IP addresses in multiple devices
AXIS Camera Management speeds up the process of
assigning IP addresses to multiple devices, by suggesting
IP addresses from a specified range.
1. Select the devices you wish to configure (different
models can be selected) and click the Assign IP
button .
2. Select Assign the following IP address range and
enter the range of IP addresses, the subnet mask and
default router the devices will use.
3. Click Update. Suggested IP addresses are listed under
New IP Addresses and can be edited by selecting a
device and clicking the Edit button.
4. Click OK.


Find Your Products By Category
- Photography
- Video Game
- Computer Equipment
- TV and Video
- Communications
- Automotive
- Portable Media
- Marine Equipment
- Cell Phone
- Baby
- Home Audio
- Fitness & Sports
- Power Tools
- Household Appliance
- Car Audio and Video
- Personal Care
- Kitchen Appliance
- Lawn and Garden
- Musical Instruments & Equipment
- Laundry Appliance
- Outdoor Cooking
Please Login
