
0
Owner's of the Axis Communications Security Camera Axis Communications Security Camera gave it a score of 0 out of 5. Here's how the scores stacked up:
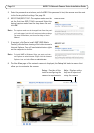

AXIS P13 Network Camera Series Installation Guide Page 15
ENGLISH
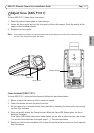
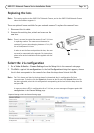
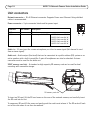
Replacing the lens
Note: This section applies to the AXIS P1347 Network Camera; and to the AXIS P1346 Network Camera
when the firmware supports it.
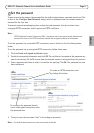
There are optional lenses available for your network camera. To replace the camera’s lens:
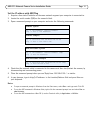
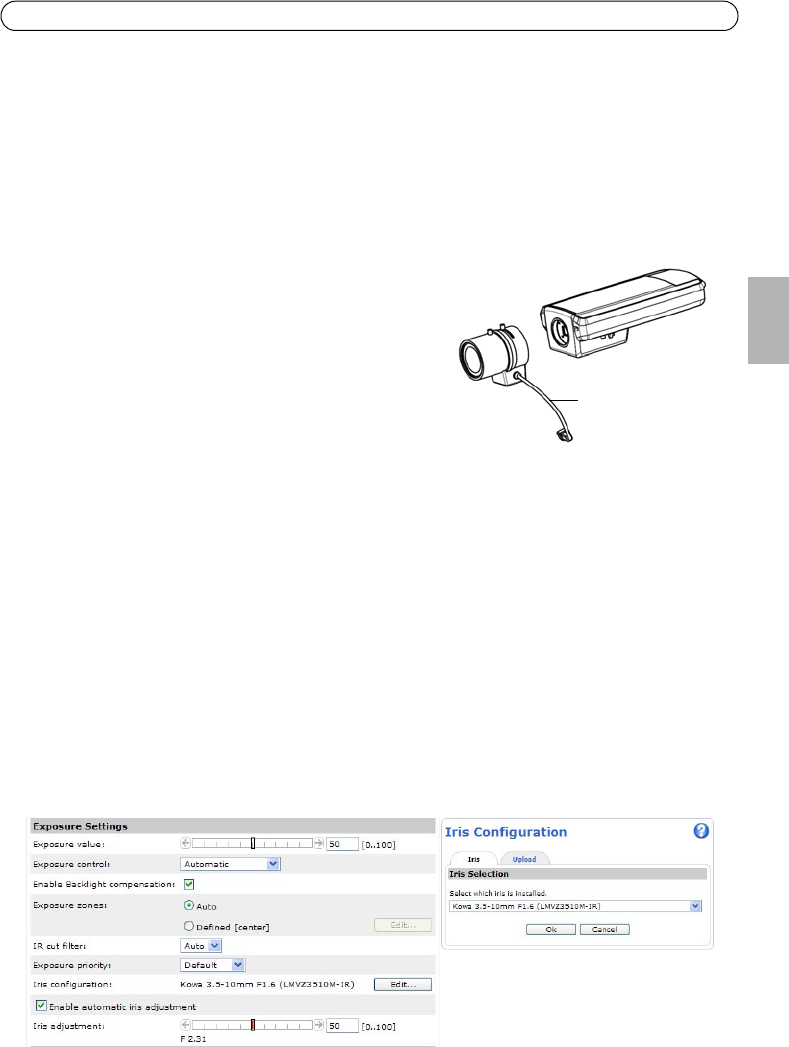
1. Disconnect the iris cable.
2. Unscrew the existing lens; attach and screw on the
new lens.
Note:
There is no need to restart the camera if one P-Iris lens
is replacing another. The camera must however be
restarted if you are interchanging between a P-iris, DC-
Iris or fixed/manual iris lens.
In order to set the focus and position the lens, the cam-
era must be connected to the network. For instructions,
please refer to the Installation Guide supplied with the
camera.
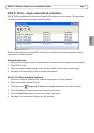
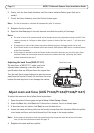
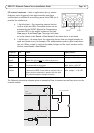
Select the iris configuration
1. Go to Video & Audio > Camera Settings from the Setup link in the camera’s web page.
2. Click Edit... against Iris configuration:. In the Iris Configuration dialog that appears, choose
the iris that corresponds to the camera’s lens from the drop-down list and click Ok.
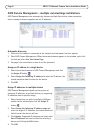
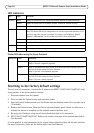
Note:
For P-Iris lenses not listed in the drop-down list, download the iris configuration file from
www.axis.com. To do this click the Upload tab, browse to the file and click Upload. After the file
has been uploaded, select the iris configuration corresponding to the lens from the drop-down list
and press Ok.
In case you select a DC iris configuration for a P-iris lens, an error message will appear against Iris
configuration: in the Camera Settings page.
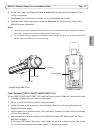
Iris cable
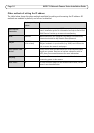
Exposure Settings within the Camera Settings page


Find Your Products By Category
- Photography
- Video Game
- Computer Equipment
- TV and Video
- Communications
- Automotive
- Portable Media
- Marine Equipment
- Cell Phone
- Baby
- Home Audio
- Fitness & Sports
- Power Tools
- Household Appliance
- Car Audio and Video
- Personal Care
- Kitchen Appliance
- Lawn and Garden
- Musical Instruments & Equipment
- Laundry Appliance
- Outdoor Cooking
Please Login
