
0
Owner's of the NETGEAR Model Vehicle ReadyNAS OS 6.0 gave it a score of 0 out of 5. Here's how the scores stacked up:


31
ReadyNAS OS 6.0
You can continue to use your ReadyNAS system while the volume is resyncing.
Resyncing can take several hours. The start and completion of the resyncing process is
recorded in the system log (see
System Logs on page 201).
If you set up email notifications for your system, you receive an email message when the
process finishes. For more information about alert notifications, see
Configure System
Alerts on page 155.
3. Repeat step 1-step 2 until you have replaced the required number of disks with
larger-capacity disks.
For more information about X-RAID2 vertical expansion requirements, see Table 2 on
page 30.
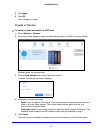
To vertically expand a Flex-RAID volume:
1. Replace one disk in the volume with a larger-capacity disk.
For more information about how to add a disk to your system, see the hardware manual
for your system, which is available at
http://support.netgear.com/product/ReadyNAS-OS6.
Note: You must use supported disks in your ReadyNAS system. For a list
of supported disks, visit http://www.netgear.com/readynas-hcl.
2. Wait for the volume to resync your data.
You can continue to use your ReadyNAS system while the volume is resyncing.
Resyncing can take several hours. The start and completion of the resyncing process is
recorded in the system log (see
System Logs on page 201).
If you set up email notifications for your system, you receive an email message when the
process finishes. For more information about alert notifications, see
Configure System
Alerts on page 155.
3. Repeat step 1-step 2 until you have replaced each disk in the volume with a larger-capacity
disk.


Find Your Products By Category
- Photography
- Video Game
- Computer Equipment
- TV and Video
- Communications
- Automotive
- Portable Media
- Marine Equipment
- Cell Phone
- Baby
- Home Audio
- Fitness & Sports
- Power Tools
- Household Appliance
- Car Audio and Video
- Personal Care
- Kitchen Appliance
- Lawn and Garden
- Musical Instruments & Equipment
- Laundry Appliance
- Outdoor Cooking
Please Login
