
0
Owner's of the NETGEAR Model Vehicle ReadyNAS OS 6.0 gave it a score of 0 out of 5. Here's how the scores stacked up:

System Settings
185
ReadyNAS OS 6.0
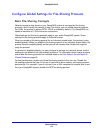
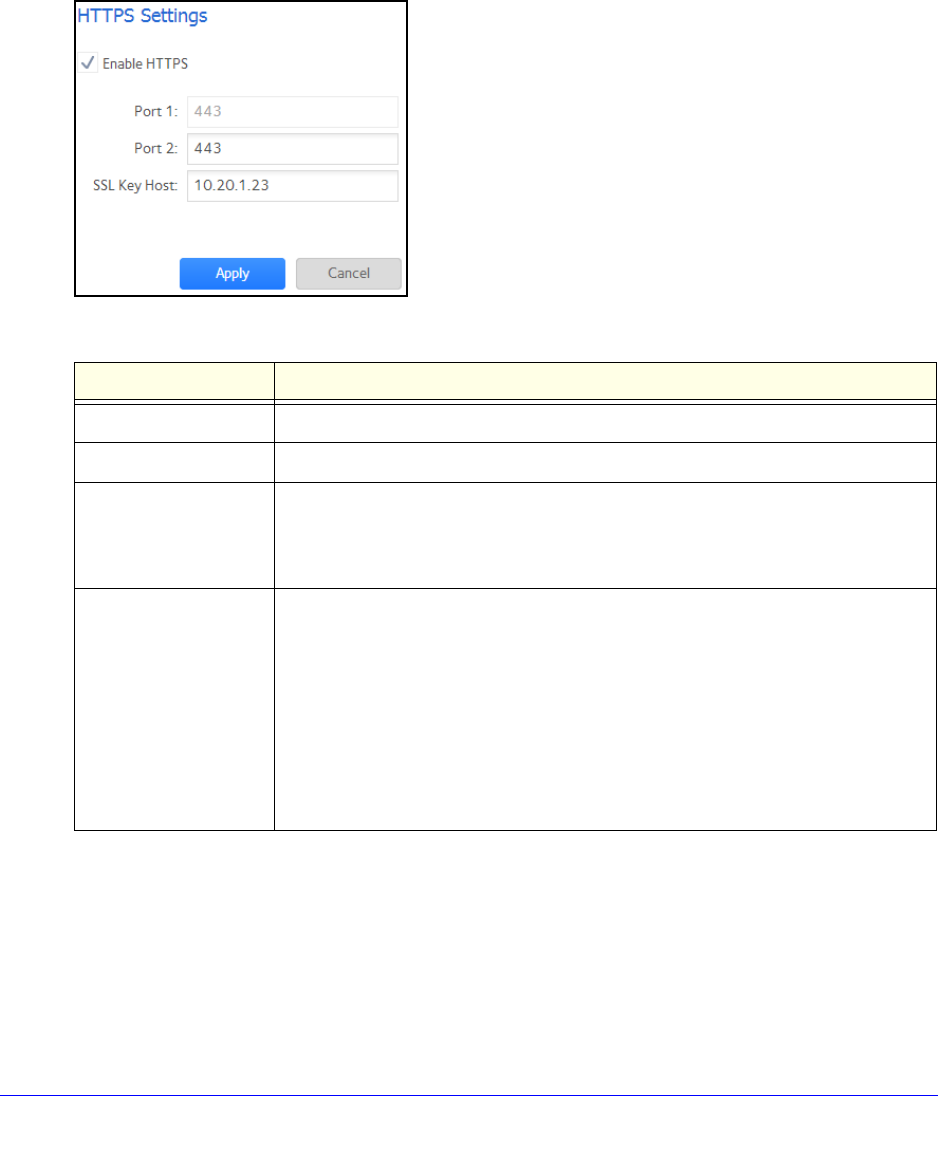
Configure HTTPS
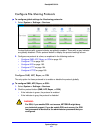
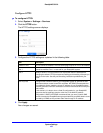
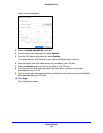
To configure HTTPS:
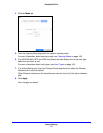
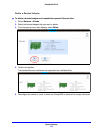
1. Select Sy
stem > Settings > Services.
2. Click the HT
TPS button.
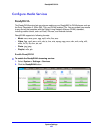
The HTTPS settings screen displays.
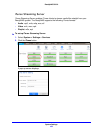
3. Configure the HTTPS settings as explained in the following table:
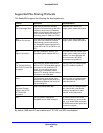
Item Description
Enable HTTPS HTTPS cannot be disabled. The local admin page requires HTTPS to be enabled.
Port 1 Cannot be modified. Port 1 is reserved for your ReadyNAS system.
Port 2 Modify to allow HTTPS connections over a port other than the standard 443.
C
hanging the default HTTPS port requires enabling port forwarding of the port you
choose on the router. See the port forwarding instructions provided with your
router.
SSL Key Host Configures the hostname used for your ReadyNAS system to generate its SSL
ce
rtificate and then creates a new SSL certificate. NETGEAR recommends that
you update this field to match the current IP address of your ReadyNAS system
and then generate a new SSL certificate to avoid future certificate errors from your
web browser.
In this scenario, it is best to have a fixed IP
configuration for your ReadyNAS
system so that the certificate remains valid. Also, if the WAN IP address
configuration is DHCP, NETGEAR recommends that you use a Dynamic DNS
service to access the ReadyNAS through a persistent fully qualified domain name
provided by a DDNS service provider rather than through an IP address.
4. Click Apply.
Your changes are saved.


Find Your Products By Category
- Photography
- Video Game
- Computer Equipment
- TV and Video
- Communications
- Automotive
- Portable Media
- Marine Equipment
- Cell Phone
- Baby
- Home Audio
- Fitness & Sports
- Power Tools
- Household Appliance
- Car Audio and Video
- Personal Care
- Kitchen Appliance
- Lawn and Garden
- Musical Instruments & Equipment
- Laundry Appliance
- Outdoor Cooking
Please Login
