
0
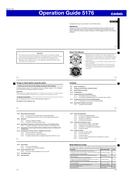
Owner's of the Casio Watch Casio Sgw400h-1bv Wrist Watch gave it a score of 0 out of 5. Here's how the scores stacked up:


Operation Guide 5176
E-50
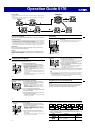
To set an alarm time
1. In the Alarm Mode, use
D
to scroll through the alarm
screens until the one whose time you want to set is
displayed.
AL1 AL2 AL3
SIG AL5 AL4
2. Hold down
A
until the alarm time starts to fl ash. This is the setting screen.
• Before the alarm time starts to fl ash, the message SET Hold will appear on the
display. Keep
A
depressed until SET Hold disappears and the alarm time
starts to fl ash.
3. Press
C
to move the fl ashing between the hour and minute settings.
Alarm ON/OFF
indicator
Alarm ON/OFF
indicator
E-51
4. While a setting is fl ashing, use
D
(+) and
B
(–) to change it.
• When setting the alarm time using the 12-hour format, take care to set the time
correctly as a.m. (no indicator) or p.m. (P indicator).
5. Press
A
to exit the setting screen.
To test the alarm
In the Alarm Mode, hold down
D
to sound the alarm.
E-52
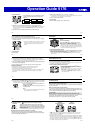
To turn an alarm and the Hourly Time Signal on and off
1. In the Alarm Mode, use
D
to select an alarm or the Hourly Time Signal.
2. When the alarm or the Hourly Time Signal you want is selected, press
A
to toggle
it between on and off.
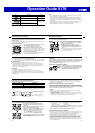
• The alarm on indicator (when any alarm is on) and the
Hourly Time Signal on indicator (when the Hourly
Time Signal is on) are shown on the display in all
modes.
To stop the alarm
Press any button.
Hourly time signal
on indicator
Alarm on indicator
Hourly time signal
on indicator
Alarm on indicator
E-53
Illumination
The display of the watch is illuminated for easy reading in
the dark.
To turn on illumination
In any mode (except when a setting screen is on the
display), press
B
to illuminate the display.
• You can use the procedure below to select either one
second or three seconds as the illumination duration.
When you press
B
, the display will remain illuminated
for about one second or three seconds, depending on
the current illumination duration setting.
To change the illumination duration
1. In the Timekeeping Mode, hold down
A
until the currently selected city code starts
to fl ash. This is the city code setting screen.
• Before the city code starts to fl ash, the message SET Hold will appear on the
display. Keep
A
depressed until SET Hold disappears and the city code
starts to fl ash.
E-54
2. Keep pressing
C
until
LT1
or
LT3
is displayed in the left corner of the display.
• See step 3 under “To change the current time and date settings” (page E-18) for
information about how to scroll through setting screens.
3. Press
D
to toggle the illumination duration between three seconds (
LT3
displayed)
and one second (
LT1
displayed).
4. After the settings are the way you want, press
A
to exit the setting screen.
Illumination Precautions
• Illumination may be hard to see when viewed under direct sunlight.
• Illumination turns off automatically whenever an alarm sounds.
• Frequent use of illumination runs down the battery.
• The watch may emit an audible sound whenever the display is illuminated. This is
due to vibration of the EL panel used for illumination, and does not indicate
malfunction.
E-55
Button Operation Tone
The button operation tone sounds any time you press one of the watch’s buttons. You
can turn the button operation tone on or off as desired.
• Even if you turn off the button operation tone, the alarm, Hourly Time Signal, and
Countdown Timer Mode alarm all operate normally.
To turn the button operation tone on and off
1. In the Timekeeping Mode, hold down
A
until the
currently selected city code starts to fl ash. This is the
city code setting screen.
• Before the city code starts to fl ash, the message
SET Hold will appear on the display. Keep
A
depressed until SET Hold disappears and the city
code starts to fl ash.
E-56
2. Keep pressing
C
until
MUTE
or
KEY
is displayed in the left corner of the display.
• See step 3 under “To change the current time and date settings” (page E-18) for
information about how to scroll through setting screens.
3.
Press
D
to toggle the button operation tone between on
(
KEY
) and off (
MUTE
).
4. After the settings are the way you want, press
A
to exit
the setting screen.
Note
• The mute indicator is displayed in all modes when the
button operation tone is turned off.
Mute indicatorMute indicator
E-57
Troubleshooting
Time Setting
■
The current time setting is off by hours.
Your Home City setting may be wrong (page E-14). Check your Home City setting and
correct it, if necessary.
■
The current time setting is off by one hour.
You may need to change your Home City’s standard time/daylight saving time (DST)
setting. Use the procedure under “To change the current time and date settings” (page
E-18) to change the standard time/daylight saving time (DST) setting.
Sensor modes
■
I can’t change the temperature, barometric pressure, and altitude units.
When
TYO
(Tokyo) is selected as the Home City, the altitude unit is set automatically
to meters (m), the barometric pressure unit to hectopascals (hPa), and the
temperature unit to Celsius (°C). These settings cannot be changed.
E-58
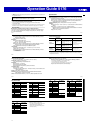
■
The battery indicator (
) appears while a sensor operation is being
performed.
The battery indicator appears in the left corner of the digital
display whenever there is not enough battery power available to
perform a sensor operation in the Barometer/Thermometer Mode
or Altimeter Mode. Sensor operation is disabled while the battery
indicator is displayed.
• Normal operation should return after battery power recovers.
■
“ERR” appears while a sensor operation is in progress.
Subjecting the watch to strong impact can cause sensor malfunction or improper
contact of internal circuitry. When this happens,
ERR
(error) will appear on the display
and sensor operations will be disabled.
Battery indicatorBattery indicator
E-59
Barometric
Pressure/Temperature
Measurement
Altitude
Measurement
•
If
ERR
appears while a measurement operation is being performed in a sensor mode,
restart the measurement. If
ERR
appears on the display again, it can mean there is
something wrong with the sensor.
•
Barometer/Thermometer Mode and Altimeter Mode sensor operations are disabled
whenever there is not enough battery power available to perform a sensor operation.
This is true regardless of the current battery level. In this case,
ERR
will appear on
the display. This does not indicate malfunction, and sensor operation should resume
once battery voltage returns to its normal level.


Find Your Products By Category
- Photography
- Video Game
- Computer Equipment
- TV and Video
- Communications
- Automotive
- Portable Media
- Marine Equipment
- Cell Phone
- Baby
- Home Audio
- Fitness & Sports
- Power Tools
- Household Appliance
- Car Audio and Video
- Personal Care
- Kitchen Appliance
- Lawn and Garden
- Musical Instruments & Equipment
- Laundry Appliance
- Outdoor Cooking
Please Login
