
0
Owner's of the Elo TouchSystems Car Video System Touchmonitor gave it a score of 0 out of 5. Here's how the scores stacked up:
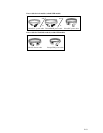
2-11
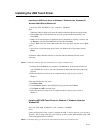
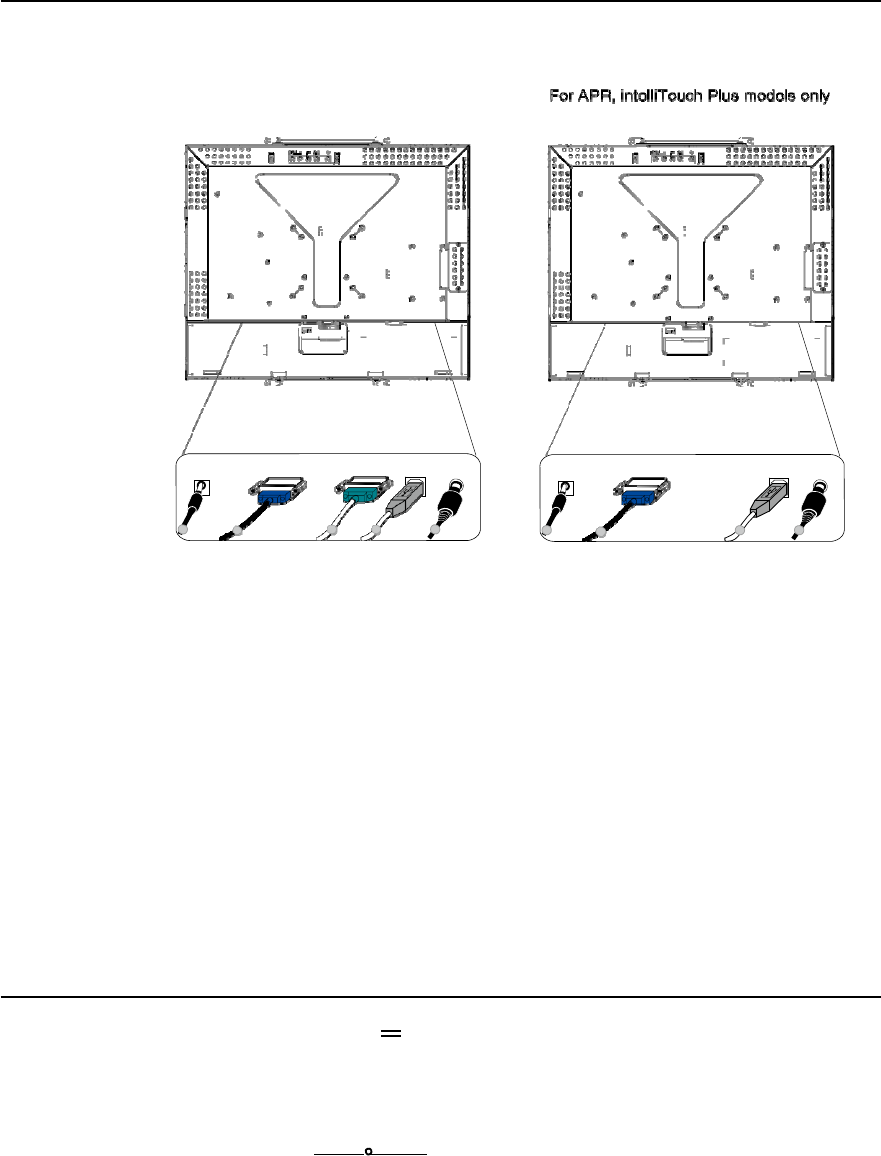
Interface Connection
Note:
Before connecting the cables to your touchmonitor and PC, be sure that the computer
and touchmonitor are turned off.
1 3 2 2
5
1 3 2
5
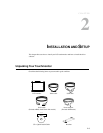
Adapter Video Cable Serial Cable USB Cable OSD Remote Control
Key
(option)
Adapter Video Cable USB Cable OSD Remote Control
Key
(option)
1. Connect one end of the power adapter to the monitor and the other end to the connector of
the power cord.
2. Connect one end of either the touchscreen serial (RS232) cable or the touchscreen USB
cable (but not both) to the rear side of the computer and the other end to the LCD monitor.
Tighten by turning the two thumb screws clockwise to ensure proper grounding ( USB cable
does not have thumb screws).
3. Connect one end of the video cable to the rear side of computer and the other to the LCD
monitor. Tighten by turning the two thumb screws clockwise to ensure proper grounding.
4. Press the power button on the rear panel to turn the monitor power on.
5. Connect one end of OSD remote control key(option) to the monitor.
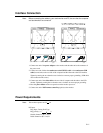
Power Requirements
Note: This monitor operates at 12V 3A
DC Input:
Plug shape: Tuning Fork Type
Plug polarity: (+)
) (-)
Outside dimension: Ø 5.5 ± Ø.1
Inside dimension: Ø 2.1 ± Ø.1


Find Your Products By Category
- Photography
- Video Game
- Computer Equipment
- TV and Video
- Communications
- Automotive
- Portable Media
- Marine Equipment
- Cell Phone
- Baby
- Home Audio
- Fitness & Sports
- Power Tools
- Household Appliance
- Car Audio and Video
- Personal Care
- Kitchen Appliance
- Lawn and Garden
- Musical Instruments & Equipment
- Laundry Appliance
- Outdoor Cooking
Please Login
