
0
Owner's of the Cisco Systems Plumbing Product Cisco 300 Series Managed Switches gave it a score of 0 out of 5. Here's how the scores stacked up:
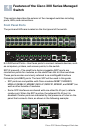

10 Cisco 300 Series Managed Switches
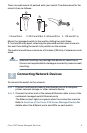
• 8 data bits
• no parity
• 1 stop bit
• no flow control
STEP 4 Enter a user name and password. User names and passwords are
both case sensitive and alpha-numeric. The default username is
cisco, and the default password is cisco.
STEP 5 If this is the first time that you have logged on with the default
username and password, the following message appears:
Please change your password from the default
settings. Please change the password for better
protection of your network. Do you want to change
the password (Y/N) [Y]?
STEP 6 Select Y, and enter a new administrator password.
CAUTION Make sure that any configuration changes are saved before
exiting by issuing the command:
copy running-config startup-config
You are now ready to configure the switch. Refer to the Cisco 300 Series
Managed Switch Administration Guide for further information.
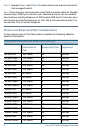
NOTE If you are not using DHCP on your network, set the IP address type
on the switch to Static and change the static IP address and subnet
mask to match your network topology. Failure to do so may result in
multiple switches using the same factory default IP address of
192.168.1.254.
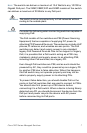
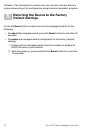
Troubleshoot Your Connection
If you cannot access your switch from the web-based interface, the switch
may not be reachable from your computer. You can test network
connections by using ping on a computer running Windows:
STEP 1 Open a command window by using Start > Run and enter cmd.
STEP 2 At the Command window prompt enter ping and the managed
switch IP address. For example ping 192.168.1.254 (the
default static IP address of the managed switch).
If you can reach the switch, you should get a reply similar to the
following:


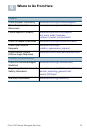
Find Your Products By Category
- Photography
- Video Game
- Computer Equipment
- TV and Video
- Communications
- Automotive
- Portable Media
- Marine Equipment
- Cell Phone
- Baby
- Home Audio
- Fitness & Sports
- Power Tools
- Household Appliance
- Car Audio and Video
- Personal Care
- Kitchen Appliance
- Lawn and Garden
- Musical Instruments & Equipment
- Laundry Appliance
- Outdoor Cooking
Please Login
