
3.7
Owner's of the Ryobi Drill HP412 gave it a score of 3.7 out of 5. Here's how the scores stacked up:

14 15
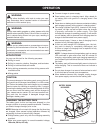
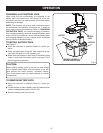
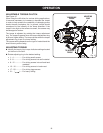
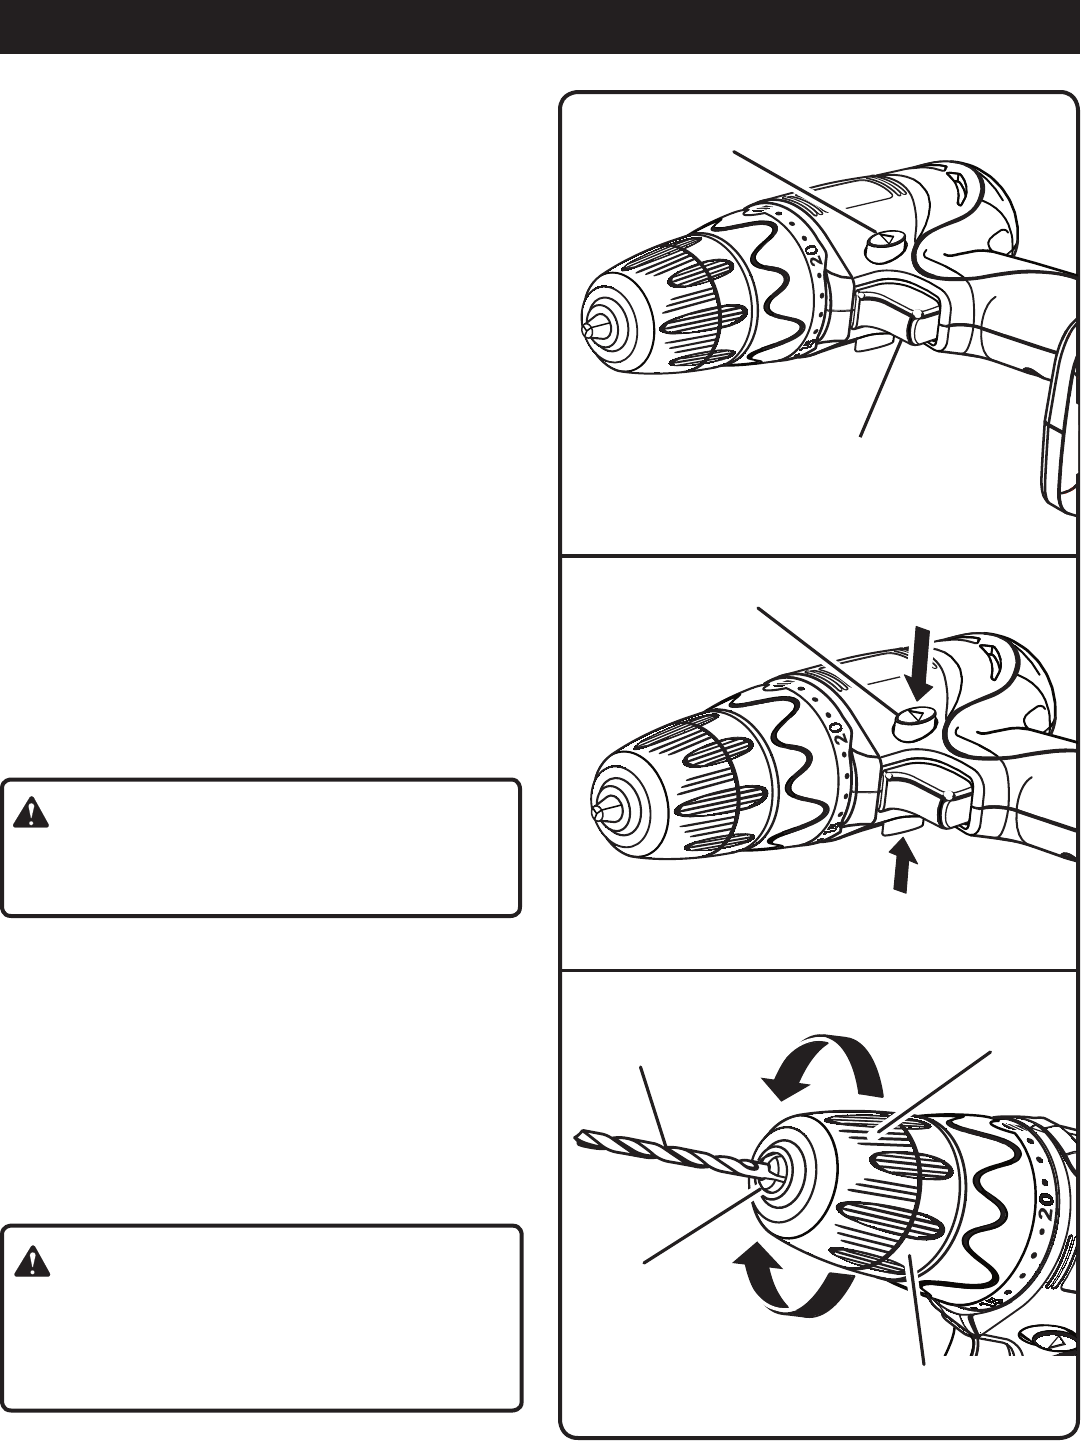
SWITCH
See Figure 7.
To turn the drill ON, depress the switch trigger. To turn it
OFF, release the switch trigger.
VARIABLE SPEED
See Figure 7.
The drill has a variable speed feature in the switch. The
switch delivers higher speed and torque with increased
trigger pressure. Speed is controlled by the amount of
switch trigger depression.
SWITCH LOCK
See Figure 7.
The switch trigger can be locked in the OFF position. This
feature helps reduce the possibility of accidental starting when
not in use. To lock the switch trigger, place the direction of
rotation selector in the center position.
REVERSIBLE
See Figure 8.
This tool has the feature of being reversible. The direction of
rotation is controlled by a selector located above the switch
trigger. With the drill held in normal operating position, the
direction of rotation selector should be positioned to the left
of the switch for drilling. The drilling direction is reversed
when the selector is to the right of the switch. When the
selector is in center position, the switch trigger is locked.
CAUTION:
To prevent gear damage, always allow chuck to come
to a complete stop before changing the direction of
rotation.
To stop, release switch trigger and allow the chuck to come
to a complete stop.
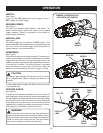
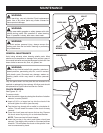
KEYLESS CHUCK
See Figure 9.
A keyless chuck has been provided with the drill to allow for
easy installation and removal of bits. As the name implies, you
can hand tighten or release drill bits in the chuck jaws. Grasp
and hold the collar of the chuck with one hand. Rotate the
chuck body with your other hand. The arrows on the chuck
indicate which direction to rotate the chuck body in order to
GRIP (tighten) or RELEASE (unlock) the drill bit.
WARNING:
Do not hold the chuck body with one hand and use the
power of the drill to tighten chuck jaws on drill bits. Chuck
body could slip in your hand or your hand could slip and
come in contact with rotating drill bit. This could cause
an accident resulting in serious personal injury.
OPERATION
Fig. 8
Fig. 7
SWITCH
TRIGGER
FORWARD / REVERSE SELECTOR
WITH CENTER LOCK POSITION
REVERSE
FORWARD
SELECTOR
CHUCK
BODY
CHUCK
COLLAR
CHUCK
JAWS
DRILL BIT
RELEASE
(UNLOCK)
GRIP
(TIGHTEN)
Fig. 9


Find Your Products By Category
- Photography
- Video Game
- Computer Equipment
- TV and Video
- Communications
- Automotive
- Portable Media
- Marine Equipment
- Cell Phone
- Baby
- Home Audio
- Fitness & Sports
- Power Tools
- Household Appliance
- Car Audio and Video
- Personal Care
- Kitchen Appliance
- Lawn and Garden
- Musical Instruments & Equipment
- Laundry Appliance
- Outdoor Cooking
Please Login
