
0
Owner's of the NEC Marine Instruments MultiSync gave it a score of 0 out of 5. Here's how the scores stacked up:


English-24
IR LOCK SETTINGS Prevents the monitor from being controlled by the wireless remote control.
When ACTIVATE is selected, all the settings are activated.
NOTE: IR LOCK SETTINGS is a function intended only to the wireless remote control buttons.
This function does not lock out access to all buttons at the back of the monitor. To return to
normal operation, press the “DISPLAY” button on the remote control for 5 seconds.
UNLOCK
MODE SELECT Selects the mode UNLOCK, ALL LOCK or CUSTOM LOCK.
UNLOCK All buttons on the remote control are available for normal operations.
ALL LOCK Locks all remote control buttons.
CUSTOM LOCK Selects which buttons to be locked from POWER, VOLUME, and INPUT button.
Except for CUSTOM LOCK settings, other buttons on the remote control are locked.
POWER: When LOCK is selected, POWER button is locked.
VOLUME: When UNLOCK is selected, sets minimum and maximum volume between VOL.0 to
VOL.100.
VOLUME (+) button and VOLUME (-) buttons are only available from the minimum
volume to the maximum volume you set.
When LOCK is selected, VOLUME (+) button and VOLUME (-) buttons are locked.
INPUT: When UNLOCK is selected, choose up to three buttons from DVI, DisplayPort, VGA,
HDMI, Y/Pb/Pr, VIDEO*
1
, S-VIDEO*
1
, OPTION*
1
which you prefer to be unlocked.
The unselected buttons are locked. When LOCK is selected, all INPUT buttons are
locked.
TILE MATRIX Allows one image to be expanded and displayed over multiple screens (up to 100) through a
distribution amplifi er.
NOTE: Low resolution is not suitable for tiling to a large number of monitors. You can operate
without a distribution amplifi er at a lower number of screens.
This function is released when selecting IMAGE FLIP except for NONE.
When “DYNAMIC” or “ZOOM” is selected in ASPECT while executing TILE MATRIX, the setting
will be applied after completing of TILE MATRIX.
H MONITORS Number of monitors arranged horizontally. 1
V MONITORS Number of monitors arranged vertically. 1
POSITION Select which section of the tiled image to be displayed on the monitor. 1
TILE COMP Turns the TILE COMP feature on. NO
TILE MATRIX ENABLE Enables Tile Matrix. NO
FRAME COMP Sets the tiled image timing to be displayed on the monitor. Large number makes large infl uence
to displayed image.
NOTE: If FRAME COMP is set to AUTO or MANUAL, V SCAN REVERSE is not available.
The image may be distorted when turning the power on or changing the settings.
NONE
NONE FRAME COMP is not available.
AUTO Sets display timing to vertical direction of all monitors automatically.
MANUAL Sets display timing to individual monitor.
V SCAN REVERSE*
2
Reverse scanning image direction. Normal scanning direction is top to bottom.
NOTE: If V SCAN REVERSE is set to AUTO or MANUAL, FRAME COMP is not available.
NONE
NONE V SCAN REVERSE is not available.
AUTO Sets automatically calculated image scanning direction to all monitors.
MANUAL Sets scanning direction to individual monitor.
NON REVERSE Sets normal scanning direction and delays 1 frame display image timing.
REVERSE Reverse scanning direction to individual monitor.
TILE MATRIX MEM When “INPUT” is selected, TILE MATRIX setting is applied to each signal input. COMMON
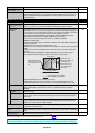
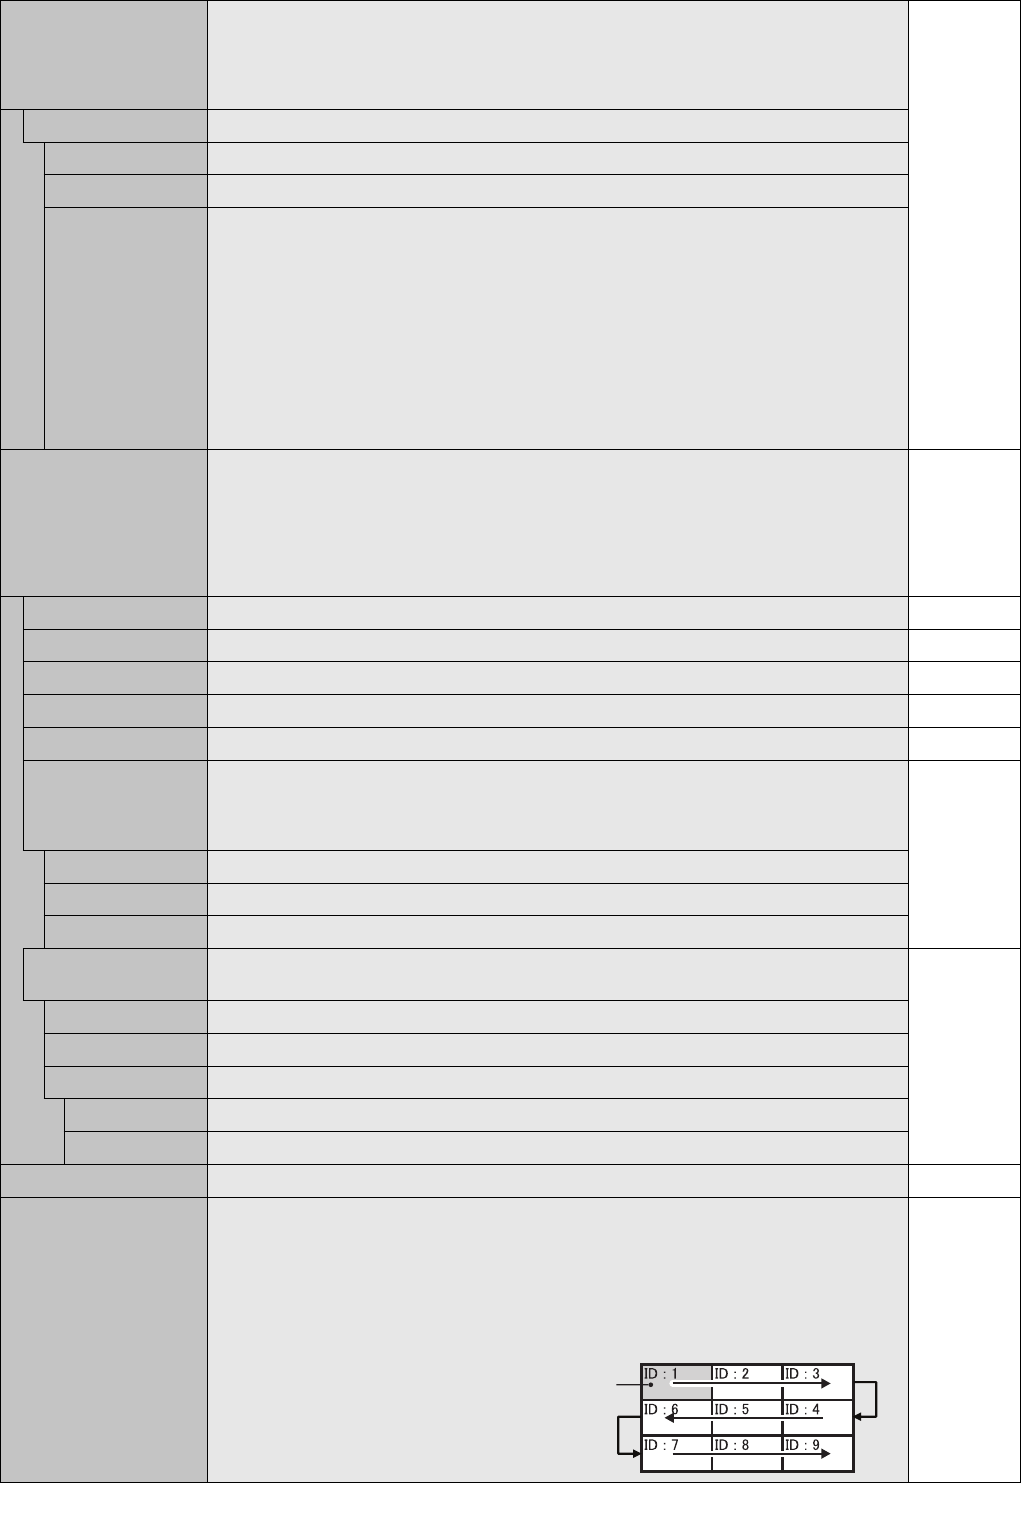
AUTO TILE MATRIX
SETUP
Allows auto setting of multiple screens by inputting the number of monitors arranged horizontally
and vertically on the primary monitor. Following settings are set automatically: MONITOR
ID, TILE MATRIX, TILE MATRIX MEM, Input Signal, VIDEO OUT SETTING, DisplayPort in
TERMINAL SETTING.
NOTE: All monitors which follow in the chain with LAN should be ON. When executing this
function while in standby mode or power save mode, “LAN POWER” should be set to ON.
AUTO ID will be automatically executed. When you use this function, it is recommended that
monitors are chained by DisplayPort cable.
Example of installation via LAN:
H MONITORS 3
V MONITORS 3
Primary monitor
DEACTIVATE
*1: This function depends on which option board you use.
*2: Except for X554UNS.
Add


Find Your Products By Category
- Photography
- Video Game
- Computer Equipment
- TV and Video
- Communications
- Automotive
- Portable Media
- Marine Equipment
- Cell Phone
- Baby
- Home Audio
- Fitness & Sports
- Power Tools
- Household Appliance
- Car Audio and Video
- Personal Care
- Kitchen Appliance
- Lawn and Garden
- Musical Instruments & Equipment
- Laundry Appliance
- Outdoor Cooking
Please Login
