

0
Owner's of the Lowrance electronic Marine GPS System Lowrance Electronics Marine GPS System gave it a score of 0 out of 5. Here's how the scores stacked up:


9
Mark the center of each slot for the mounting screw pilot holes. You
will drill one hole in the center of each slot.
Drill the holes. For the one-piece bracket, use the #29 bit (for the #10
screws). For the two-piece bracket, use the #20 bit (for the #12 screws).
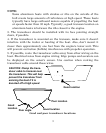
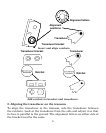
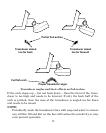
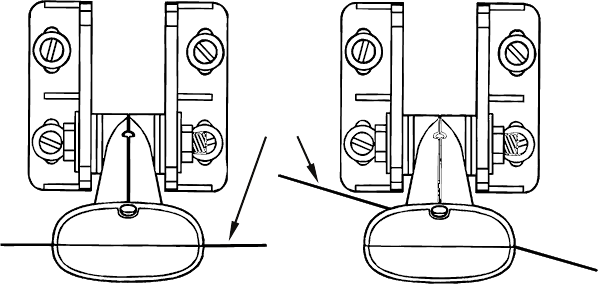
5. Attaching transducer to transom.
Both bracket types: Attach the transducer to the transom. Slide the
transducer up or down until it's aligned properly with the bottom o
f
the hull as shown in the preceding and following figures. Tighten the
bracket's mounting screws, sealing them with the sealant.
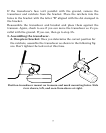
Adjust the transducer so that it's parallel to the ground even if you
have a Deep-"vee" hull. Tighten the nut until it touches the outer
washer, then add 1/4 turn. Don't over tighten the lock nut! If you do,
the transducer won't "kick-up" if it strikes an object in the water.
Align transducer centerline with hull bottom and attach transducer to
transom. Rear view of dual-frequency Skimmer shown.
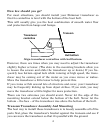
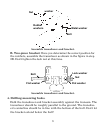
6. Route the transducer cable through or over the transom to the sonar
unit. Make sure to leave some slack in the cable at the transducer.
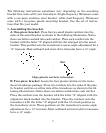
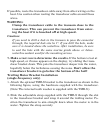
Flat-bottom hull Deep-"vee" hull
Bottom
of
hull


Find Your Products By Category
- Photography
- Video Game
- Computer Equipment
- TV and Video
- Communications
- Automotive
- Portable Media
- Marine Equipment
- Cell Phone
- Baby
- Home Audio
- Fitness & Sports
- Power Tools
- Household Appliance
- Car Audio and Video
- Personal Care
- Kitchen Appliance
- Lawn and Garden
- Musical Instruments & Equipment
- Laundry Appliance
- Outdoor Cooking
Please Login
