
3.0
Owner's of the LG Electronics Cell Phone Vu gave it a score of 3.0 out of 5. Here's how the scores stacked up:

<< 73
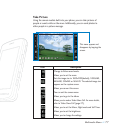
Multimedia Menu
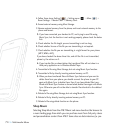
4. From within the Windows Media Player application, click on the Library tab.
5. From the left side of the Library tab, click on All Music. The right side of the
page is then populated with all of the songs which the player has previously
found.
6. Right click on the song entry and select, Add to.. > Additional Playlists.
7. From the Add to Playlist dialog, click the New button and type in a unique
playlist name.
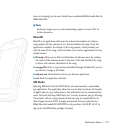
8. Click OK when you are done entering the new playlist name. The new
Windows Media playlist is then displayed within the My Playlist section of
the Library tab (left side).
9. Drag and drop the newly created playlist from the My Playlist section to the
phone Music Sync Player listed just above it. The phone Music Sync Player
appears on the left side of the screen.
n Note
If there are no items present in the playlist, click the Edit Playlist button and
begin adding the music files from among the various media categories.
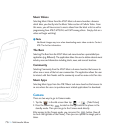
10 . It is now safe to unplug the USB connector from the handset.
n Note
1. If you connect handset with specific USB Hub on your PC, above Music Sync
service can not be work. So we recommend direct USB Connection on your
PC not using HUB.
2. Once you connect your mobile phone to the PC, the phone's screen will dis-
play the "Connecting as Music Sync..." message. If the message does not
change to "Connected as Music Sync Mode. Do not disconnect during trans-
fer.", check if your PC is running Windows XP and Windows Media Player 10
or later. If your PC is running Windows XP and Windows Media Player 9,
please download WMP10 or WMP11 by visiting Microsoft site. If your PC is
running XP and WMP10 or later but "Connecting as Music Sync..." message
does not disappear from the screen after you have tried to establish connec-
tion three to four times, perform one of the following methods and try again.
Notice that all of the existing data will be erased on microSD card if you use
the below process.


Find Your Products By Category
- Photography
- Video Game
- Computer Equipment
- TV and Video
- Communications
- Automotive
- Portable Media
- Marine Equipment
- Cell Phone
- Baby
- Home Audio
- Fitness & Sports
- Power Tools
- Household Appliance
- Car Audio and Video
- Personal Care
- Kitchen Appliance
- Lawn and Garden
- Musical Instruments & Equipment
- Laundry Appliance
- Outdoor Cooking
Please Login
