
3.0
Owner's of the Karcher Pressure Washer K 5.540 gave it a score of 3.0 out of 5. Here's how the scores stacked up:


6 English
For more detailed information on
how to assemble this pressure
washer, please visit
www.karcherresidential.com/as-
sembly
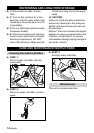
A Philips Screwdriver, medium
size (not supplied)
for final assembly
Mount loose parts delivered with appli-
ance prior to start-up.
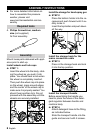
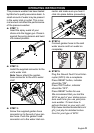
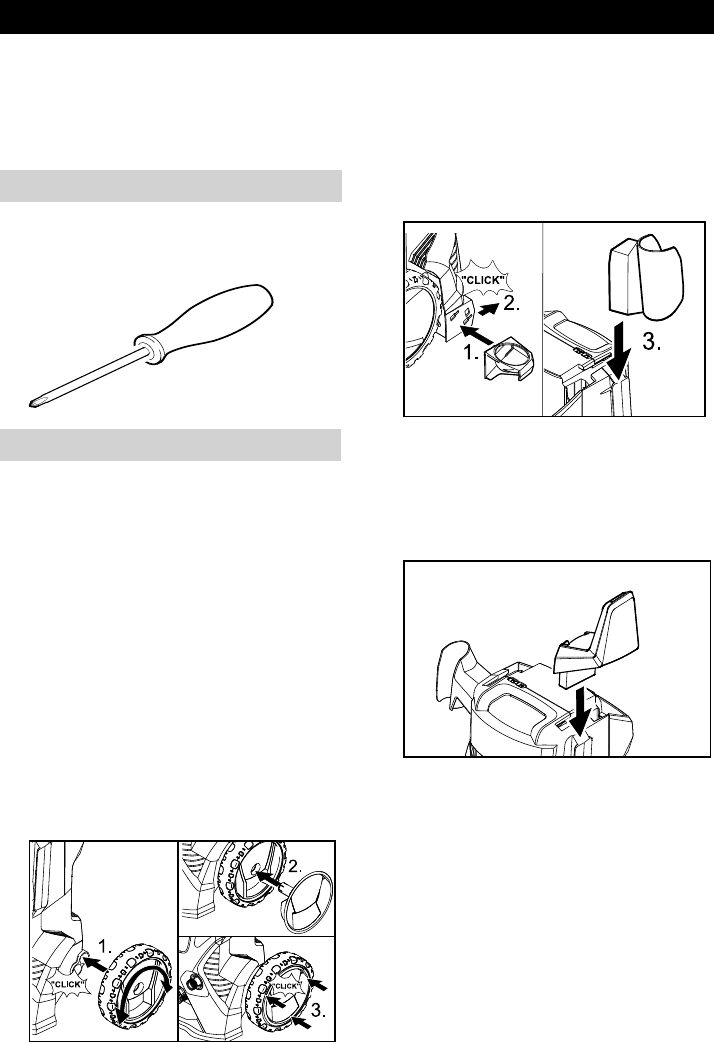
STEP 1:
Insert the wheel into the body, rotat-
ing the wheel as you push it into
place. You should hear a click when
the wheel is completely inserted.
Then push the wheel cap into place
on the wheel, press around edges
and the center of the wheel cap to
make sure it is properly seated. You
should hear another click. Do not
proceed with the assembly until the
wheels are securely installed.
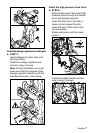
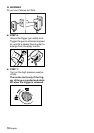
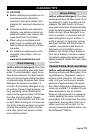
STEP 2:
Place the bottom holder into the re-
cesses and push forward until it au-
dibly locks in.
Insert the top holder and push down
all the way.
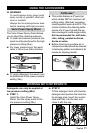
STEP 3:
Press in the storage hook and lock
it into the top position.
Before assembling the handle you
need to place the tubes of the deter-
gent regulator between handle and
machine body.
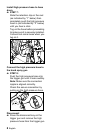
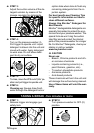
STEP 4:
Attach detergent hose to the fitting,
as indicated below.
Slide the transport handle into the
guide and secure it with 2 screws.
ASSEMBLY INSTRUCTIONS
Required tools
Assembly
Install wheels and hub caps
Install the storage for hand-spray gun
Install the storage hook for the
mains connection cable
Install the transport handle


Find Your Products By Category
- Photography
- Video Game
- Computer Equipment
- TV and Video
- Communications
- Automotive
- Portable Media
- Marine Equipment
- Cell Phone
- Baby
- Home Audio
- Fitness & Sports
- Power Tools
- Household Appliance
- Car Audio and Video
- Personal Care
- Kitchen Appliance
- Lawn and Garden
- Musical Instruments & Equipment
- Laundry Appliance
- Outdoor Cooking
Please Login
