
0
Owner's of the Cisco Systems Home Security System Cisco Asa 5505 10-User Bundle gave it a score of 0 out of 5. Here's how the scores stacked up:
3-5
Cisco ASA 5505 Adaptive Security Appliance Hardware Installation Guide
OL-18362-01
Chapter 3 Installing the Cisco ASA 5505
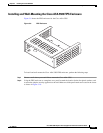
Rack or Wall Mounting the Cisco ASA 5505
Mounting the Chassis
You can wall-mount or rack-mount the adaptive security appliance. The part number for ordering a
wall-mount kit for the adaptive security appliance is ASA-5505-WALL-MNT= , the part number for
ordering a rack-mount kit for the adaptive security appliance is ASA5505-RACK-MNT= . This section
includes the following topics:
• Wall-Mounting the Chassis, page 3-5
• Rack-Mounting the Chassis, page 3-7
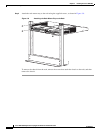
Wall-Mounting the Chassis
To wall-mount the chassis, perform the following steps:
Step 1 Choose a wall where you would like to mount the adaptive security appliance.
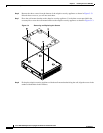
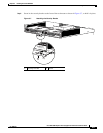
Step 2 Using the wall-mounting bracket as a template, use a pencil to mark the location for the four plastic anchors,
used to secure the adaptive security appliance to the wall. Make sure all the pencil marks are located in the
center as shown in Figure 3-10.
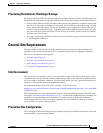
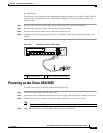
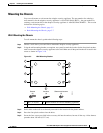
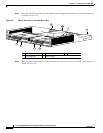
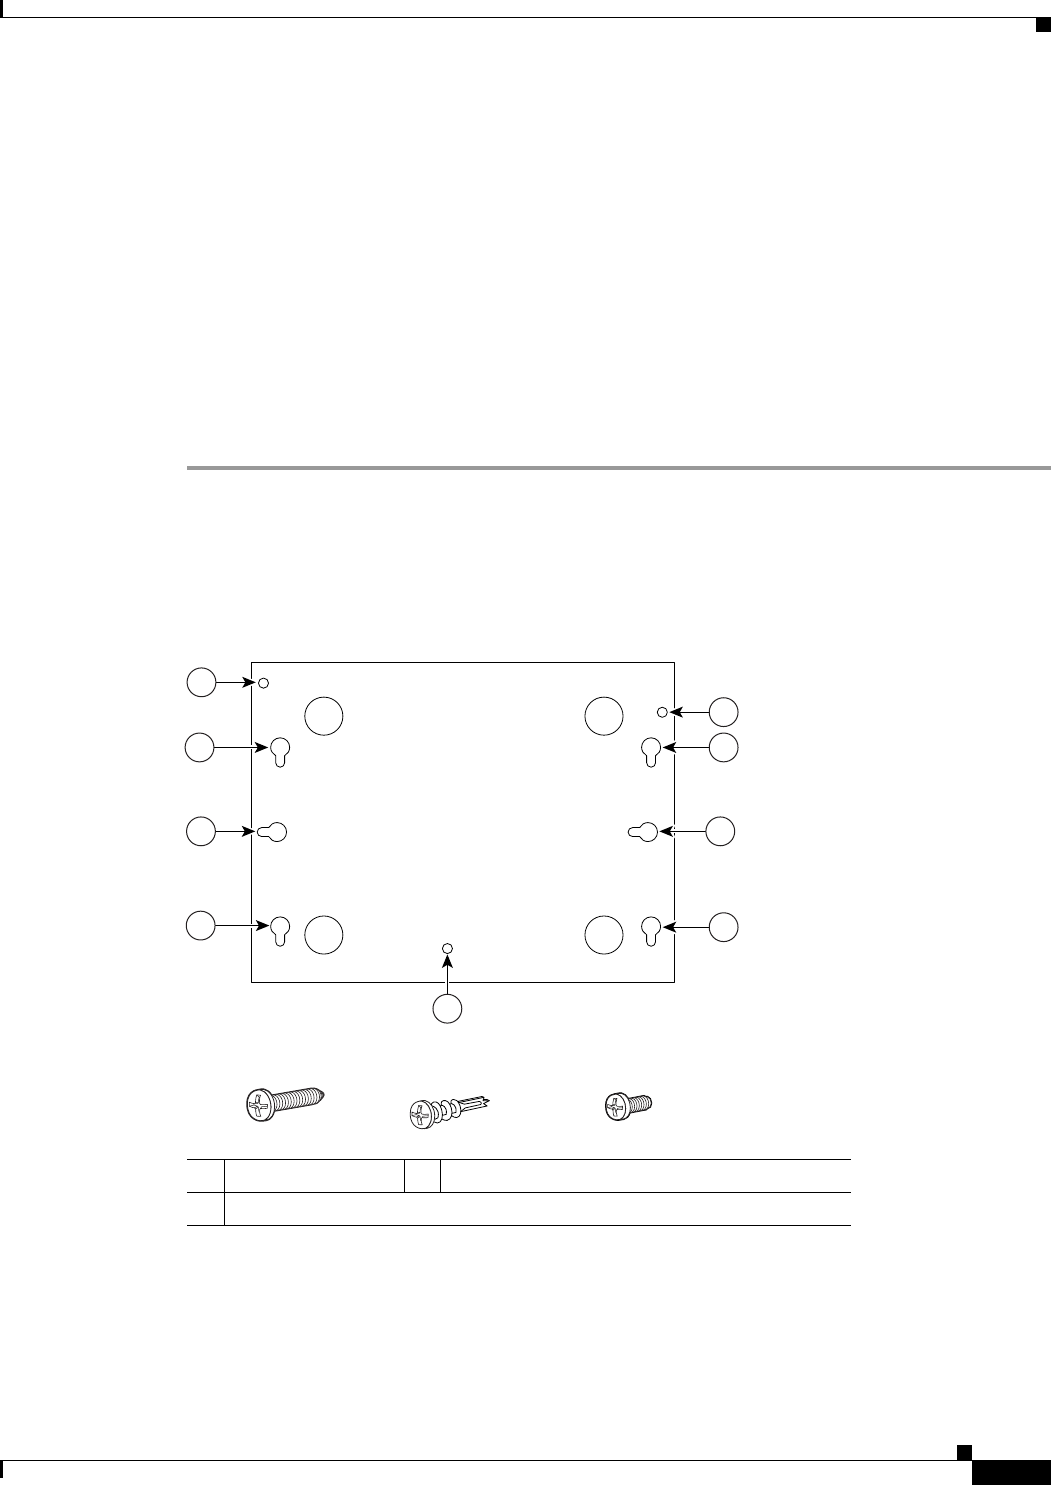
Figure 3-3 Wall-Mounting Bracket
Step 3 Drill a hole on the wall at each mark you made for the location for the plastic anchors.
Step 4 Press the four plastic anchors into the holes.
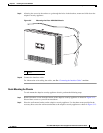
Step 5 Screw the four screws provided in the accessory kit into the anchors, but not all the way. Allow them to
protrude about 1/8-inch (0.317 cm).
1 M3 x 12 screws 3 Plastic anchors for vertical mounting (optional)
2 Plastic anchors
191805
1
1
2
2
Screws
(4)
Anchors
(4)
Sheet metal screws
(3)
3
2
3
2
1


Find Your Products By Category
- Photography
- Video Game
- Computer Equipment
- TV and Video
- Communications
- Automotive
- Portable Media
- Marine Equipment
- Cell Phone
- Baby
- Home Audio
- Fitness & Sports
- Power Tools
- Household Appliance
- Car Audio and Video
- Personal Care
- Kitchen Appliance
- Lawn and Garden
- Musical Instruments & Equipment
- Laundry Appliance
- Outdoor Cooking
Please Login
