

4.6
Owner's of the Canon Digital Camera Canon EOS 40D gave it a score of 4.6 out of 5. Here's how the scores stacked up:

123
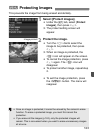
This prevents the image from being erased accidentally.
1
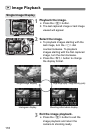
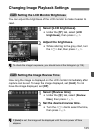
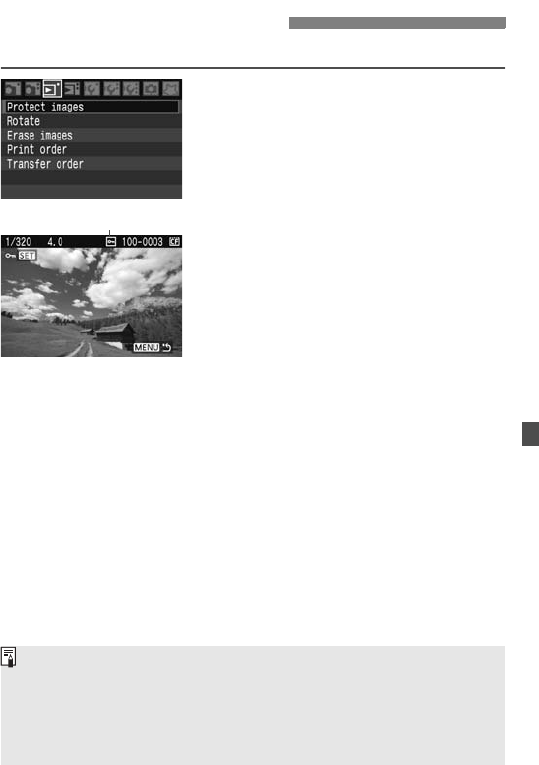
Select [Protect images].
Under the [3] tab, select [Protect
images], then press <0>.
X The protect setting screen will
appear.
2
Protect the image.
Turn the <5> dial to select the
image to be protected, then press
<0>.
X When an image is protected, the
<K> icon will appear on the screen.
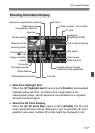
To cancel the image protection, press
<0> again. The <K> icon will
disappear.
To protect another image, repeat step
2.
To exit the image protection, press
the <M> button. The menu will
reappear.
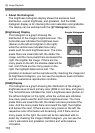
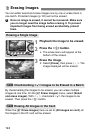
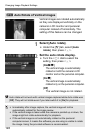
3 Protecting Images
Image protect
Once an image is protected, it cannot be erased by the camera’s erase
function. To erase a protected image, you must first cancel the
protection.
If you erase all the images (p.124), only the protected images will
remain. This is convenient when you want to erase unnecessary images
all at once.


Find Your Products By Category
- Photography
- Video Game
- Computer Equipment
- TV and Video
- Communications
- Automotive
- Portable Media
- Marine Equipment
- Cell Phone
- Baby
- Home Audio
- Fitness & Sports
- Power Tools
- Household Appliance
- Car Audio and Video
- Personal Care
- Kitchen Appliance
- Lawn and Garden
- Musical Instruments & Equipment
- Laundry Appliance
- Outdoor Cooking
Please Login
