
0
Owner's of the Bushnell GPS Receiver Onix gave it a score of 0 out of 5. Here's how the scores stacked up:

4
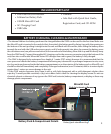
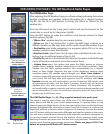
• Extra Large 3.5” Full Color LCD • Download Topographic Maps
1
• WAAS Enabled • Download Georeferenced Satellite Photographs
1
• Heads-Up Digital Compass • Built-In SiRF Technology 20 Channel Receiver
• Built-In Base Maps (North America) • Waterproof (IPX7 Standard)
• Save/Load Waypoints, Trails and Routes • Durable Rubber Armoring
• Stores Up to 1000 Waypoints & 20 Routes • SafeTrack™ Battery Conservation Mode
• Micro SD Card Storage (128MB card inc.) • Display XM WX Weather Data
2
• Exclusive Screen Layering inc. XM Weather • Listen to XM Radio Entertainment and Sports
2
with Bushnell ONIX Channel Monitor
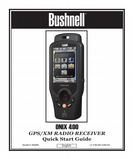
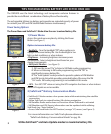
ONIX 400 Model #36-4000 FEATURES
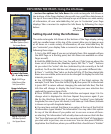
Thank you for purchasing the Bushnell ONIX400 – the most advanced outdoor navigation device available today!
This device is capable of receiving both GPS Satellite and XM Satellite Radio signals in an outdoor environment.
The ONIX400 comes preloaded with a base road map of the United States and Canada including a Points of Interest
data base. The GPS receiver has the capability to receive satellite signals worldwide. The XM Satellite Radio receiver
presently only functions in the United States and Canada.
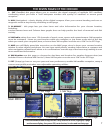
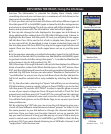
ONIX has been designed to be much simpler to operate than other handheld GPS receivers, while offering powerful
features like TruView navigation, which allows you to layer satellite photos or topographic maps right over your trail
map screen, providing a useful “real world” frame of reference
1
. And for the first time in a handheld GPS device, the
ONIX400 lets you receive and view XM Weather data for your location right on the map-you can even layer weather
radar over a satellite photo of the area! And, you can listen to XM Radio music or news and keep an eye on the latest
sports scores or weather developments without leaving the GPS map screen
2
! As much or as little information as
you choose can all be displayed together in various combinations on the extra large 3.5” full color LCD screen.
Easily create and store user profiles that let you store your most frequently used personal setups, including satellite
photos of your favorite camping or hunting area. An Almanac screen uses data from internal sun and moon tables to
predict animal activity levels at different times of the day- for any date and location. Bushnell’s exclusive SafeTrack™
battery conservation feature extends your battery life while maintaining GPS contact, so you can check your current
location anytime without the restart delay typical of other GPS receivers. You will find your ONIX to be an invaluable
companion for all your outdoor adventures. Just hit the “Hot” button to quickly see your current position, or view
updated nearby weather conditions.
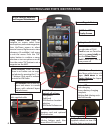
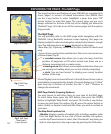
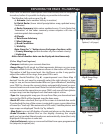
Before using your new ONIX, please read the instructions contained in this manual and take time to familiarize
yourself with the unit’s operation and many great features. You may want to start near your home, by turning on the
ONIX, then pressing the MENU button to run through the 7 Pages (SAT, NAV, Almanac, XM Radio, MAP, XM Weather,
SET) while reading the manual section for each. After that, practice using the “Hot” button and 5-way button to see
and select from a menu of options, perhaps on the SET screen by setting a few personal preferences for information
displays. Once you begin feeling more comfortable with the controls and screens, the best way to really learn to use
your ONIX is to take it outside (right in your own neighborhood or a local park), and let it lock onto the GPS satellite
signals as you watch the SAT page (be patient, this can take 3 or 4 minutes the first time you use it-make sure you
have a clear view of the sky and are not right next to a large building for best results), then take a short walk and
finish by using the ONIX to guide you back to your starting point (you can either mark a waypoint at the start by
clicking the center of the 5-way button twice, or just begin walking, later following the dotted “breadcrumb” trail
back). After that, you might try downloading a satellite photo of this local area, layer it on top of the map screen,
and try walking the same trail again, setting a few waypoints as you go. Continue referring to this manual and
practicing as often as necessary until you master the basics, before heading out on a hike of any significant length
or attempting to navigate an unfamiliar area.
2
Subscription to XM weather and/or entertainment services required
1
Download satellite photos and topo maps at www.bushnellgps.com


Find Your Products By Category
- Photography
- Video Game
- Computer Equipment
- TV and Video
- Communications
- Automotive
- Portable Media
- Marine Equipment
- Cell Phone
- Baby
- Home Audio
- Fitness & Sports
- Power Tools
- Household Appliance
- Car Audio and Video
- Personal Care
- Kitchen Appliance
- Lawn and Garden
- Musical Instruments & Equipment
- Laundry Appliance
- Outdoor Cooking
Please Login
