
0
Owner's of the Bushnell GPS Receiver Onix gave it a score of 0 out of 5. Here's how the scores stacked up:

16
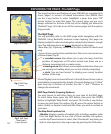
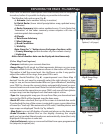
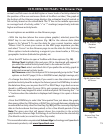
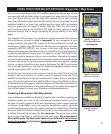
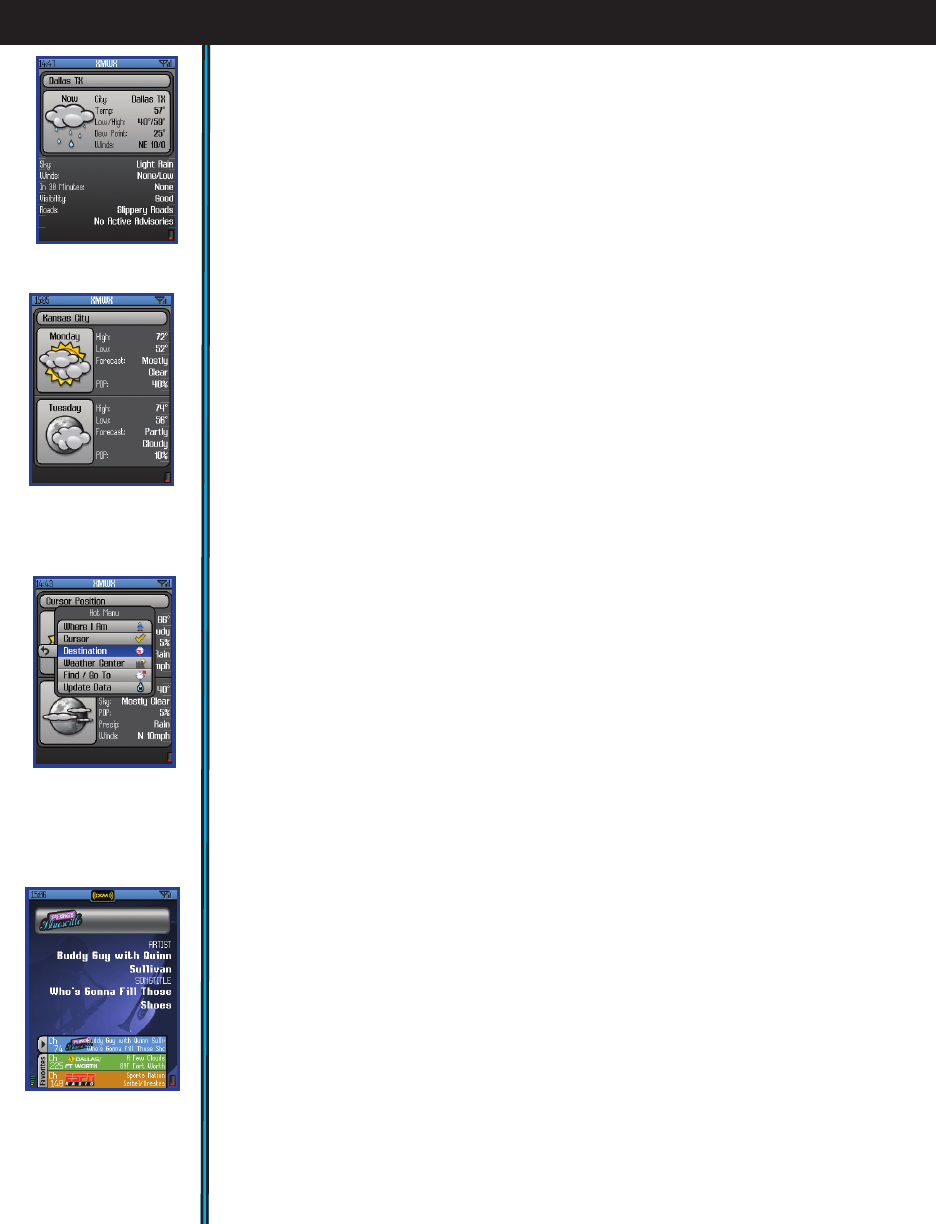
The XM Weather Page
After selecting the XM Weather Page you will see a display showing the various
weather conditions and weather related information for a selected location
(Fig. 21). Use the OK or HOT buttons to change the “When” or “Where” for the
weather info.
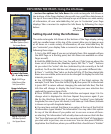
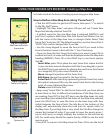
Press the OK button on the 5-way pad to select and see the forecast for the
current day, or any of up to 3 days later (Fig. 22).
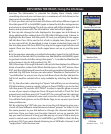
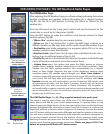
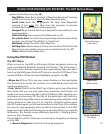
Press the HOT button to make the conditions and forecast relevant to these
location options (Fig. 23):
• “Where I Am”-weather data for your current location
• Cursor-use the 5 way button first to place the MAP page crosshair on a
different location on the map, then use this option to see the weather there.
• Destination-used while navigating to a waypoint, photo, POI, etc to view
weather conditions near that location.
• Weather Center-select from a list of major cities (alphabetical order-use +/-
buttons to go to additional pages of the city list)
• Find/Go To-pick from the standard list (same as this option in the MAP page
menu) of locations and places to see the weather there.
• Update Data-select this option and press the Right button to choose:
Update Now (updates weather information to the latest available), Auto
Update (let the ONIX update weather info automatically on a regular
basis) or Data Status (monitor the age of the displayed weather data,
reception status, XM satellite signal strength, etc). Note: “Auto Update” is
a battery saving XM operating mode which limits active XM satellite contact
time (much like SafeTrack does with regard to the GPS satellites). With Auto
Update selected, you will not be able to receive “streaming” XM signals, such
as entertainment radio, and the Radar Summary feature will not function
(Update Now also does not provide a Radar Summary). XM reception is
activated briefly at regular intervals, and only to receive updated weather and
sports information. To return to continuous operation, press the Power button
briefly to go to the Power menu.
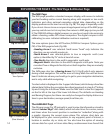
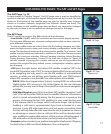
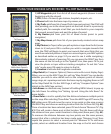
The XM Radio Page
(Fig. 24) (Plug supplied earbuds into audio jack)
This page is used to select from any of the over 170 XM channels of music,
news, sports and talk for your audio entertainment. To quickly listen to one
channel, press the Right button to see the channel list, then use the Up/Down
buttons to highlight the channel you want. Press OK to listen to it-or press the
Right/Left buttons to browse other categories of channels. You can also press
the HOT button while you are on the XM page, and use the options in the menu
you will see to mark favorite channels, hide channels you aren’t interested in,
set up the channel monitor box at the bottom of the screen to easily swap
listening channels-and even turn the box into your personal “Scoreboard” to
monitor your favorite sports teams and scores. Please see pages 26 & 27 for
details on using the XM Radio HOT button menu.
EXPLORING THE PAGES : The XM Weather & Radio Pages
Fig 23. Weather Page
Weather at
Destination
(Press HOT button to
choose “Where”)
Fig 22. Weather Page
Two Day Forecast
(Press OK button to
choose “When”)
Fig 21. Weather Page
Current Details (“Now”)
Fig 24. XM
Radio Page


Find Your Products By Category
- Photography
- Video Game
- Computer Equipment
- TV and Video
- Communications
- Automotive
- Portable Media
- Marine Equipment
- Cell Phone
- Baby
- Home Audio
- Fitness & Sports
- Power Tools
- Household Appliance
- Car Audio and Video
- Personal Care
- Kitchen Appliance
- Lawn and Garden
- Musical Instruments & Equipment
- Laundry Appliance
- Outdoor Cooking
Please Login
