
0
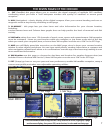
Owner's of the Bushnell GPS Receiver Onix gave it a score of 0 out of 5. Here's how the scores stacked up:
12
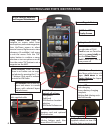
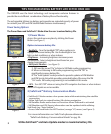
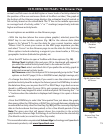
EXPLORING THE PAGES : Using the Info Boxes
• (not on the options list) Info Boxes-the wide rectangular Info Boxes at
the bottom of the Page displays (along with two small Nav data boxes at
the top of the screen) allow you to keep an eye at all times on a wide variety
of information, all user selectable-they let you to “customize” your Page
displays. Take a moment to explore the Info Boxes by following the steps
below:
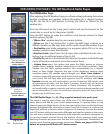
Setting Up and Using the Info Boxes
The wide rectangular Info Boxes at the bottom of the Page display (along
with two smaller boxes at the top of the screen) allow you to keep an eye
at all times on a wide variety of information, all user selectable-they let
you “customize” your display. Take a moment to explore the Info Boxes by
following these steps:
1. Go to the MAP page if you are not already there (this example will use
the MAP Page as a starting point, but Info Boxes are available on other
Pages as well).
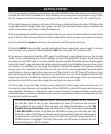
2. Hold the MENU button for 2 sec. You will see 4 “tabs” pop up above the
lower set of Info Boxes: Nav, Weather, Sports, XM. The “+” and “-” buttons
let you select the “active” info box (indicated by tab currently at far left
position). You’ll see the info box sets change as you select different tabs .
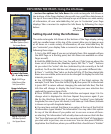
3. Press “+” until the “Nav” tab is on the far left (Fig. 7).The Nav related Info
Boxes are now visible, active and can be changed to display the info that
interests you most.
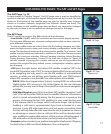
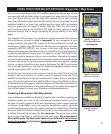
4. Use UP/DOWN buttons to highlight one of the listed options (for
example, “Local Time” from the 3rd list) (Fig. 8), then press OK to checkmark
it (press EXIT to return without changing the selected Info Box). The first
Info Box will change to display the local time-your new selection has
replaced the previous type of info.
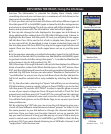
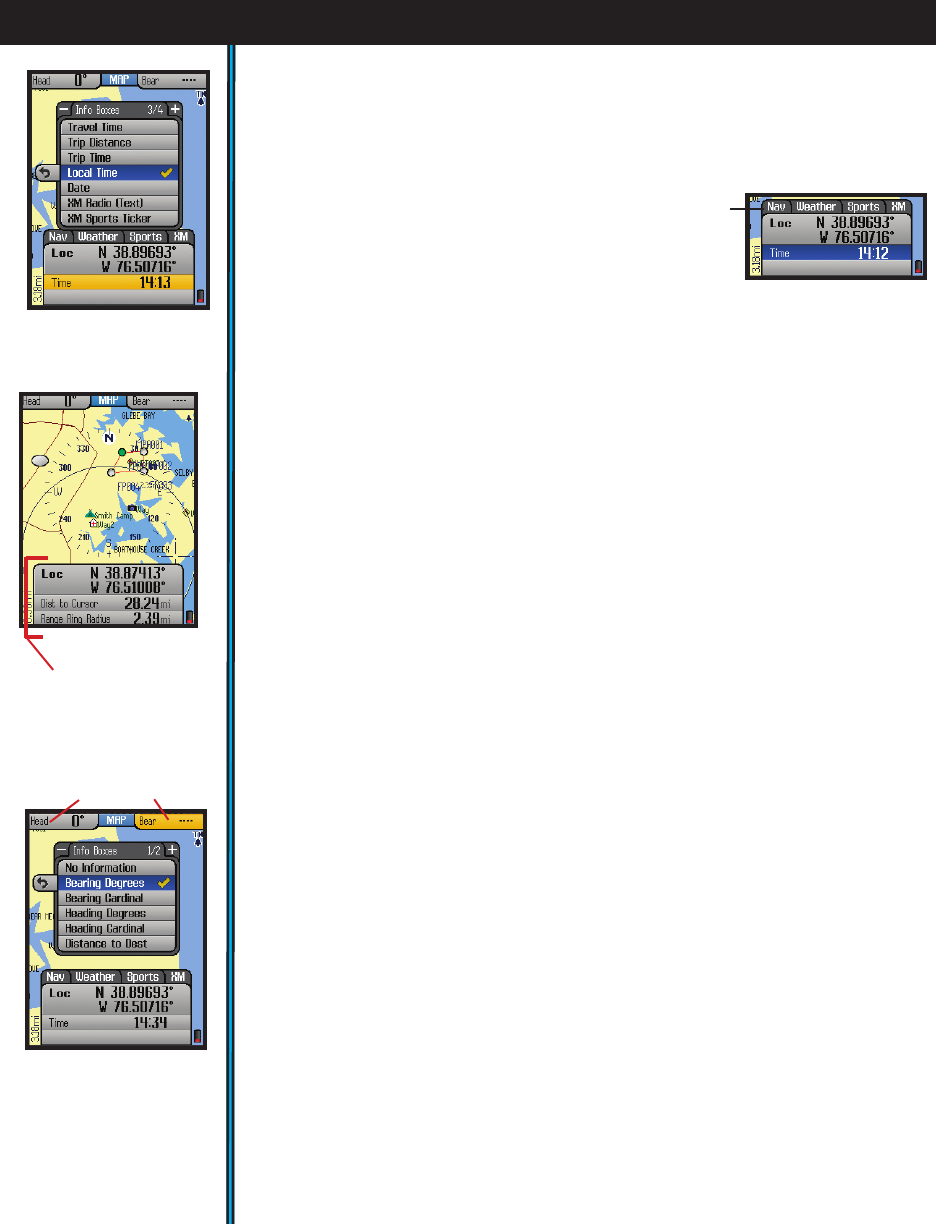
5. Press DOWN to select the second Info Box and repeat steps 3 & 4 to
change what is displayed in this box. Repeat the process again if you
like for the third box. Note that if you choose “Location” (your latitude/
longitude) for one of your info boxes, it will take up 2 Info Boxes (latitude
is shown on top with longitude below).
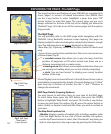
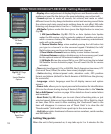
6. You may have noticed that there is an option at the top of the first list
of information types labeled “No Information”. You may select this option
for any of the Info Boxes if you prefer not to use one or more of them-
as selecting “No Information” will actually clear and remove that Info Box
“slot” from the lower set of boxes. You can reduce the “stack” of three boxes
you start with to just two, one or even zero. You can also press DOWN to
step below the third box, where you will find that a fourth box is “hidden”
Fig. 7
Nav
tab selected
Fig 8.
Info Boxes
Info Box Options (Nav)
for Lower Boxes
Fig 9.
MAP Page
4 Info Boxes After
Set Up and Exit
Lower Info Boxes
(0 ~ 4, set by user)
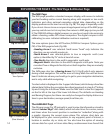
Fig 10.
MAP Page
Info Box Options
for Upper Boxes
Upper Info Boxes


Find Your Products By Category
- Photography
- Video Game
- Computer Equipment
- TV and Video
- Communications
- Automotive
- Portable Media
- Marine Equipment
- Cell Phone
- Baby
- Home Audio
- Fitness & Sports
- Power Tools
- Household Appliance
- Car Audio and Video
- Personal Care
- Kitchen Appliance
- Lawn and Garden
- Musical Instruments & Equipment
- Laundry Appliance
- Outdoor Cooking
Please Login
