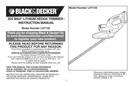

0
Owner's of the Black & Decker Trimmer Black & Decker Trimmer gave it a score of 0 out of 5. Here's how the scores stacked up:


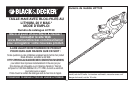

OPERATION
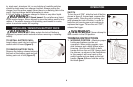
SWITCH
To turn the unit “ON”, slide the lock off button,
shown in figure 3, forward and, squeeze the
trigger switch. Once the unit is running, you
may release the lock off button. In order to
keep the unit running you must continue to
squeeze the trigger. To turn the unit “OFF”,
release the trigger.
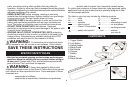
WARNING: Never attempt to
lock a switch in the ON position.
TRIMMING INSTRUCTIONS
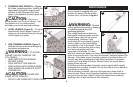
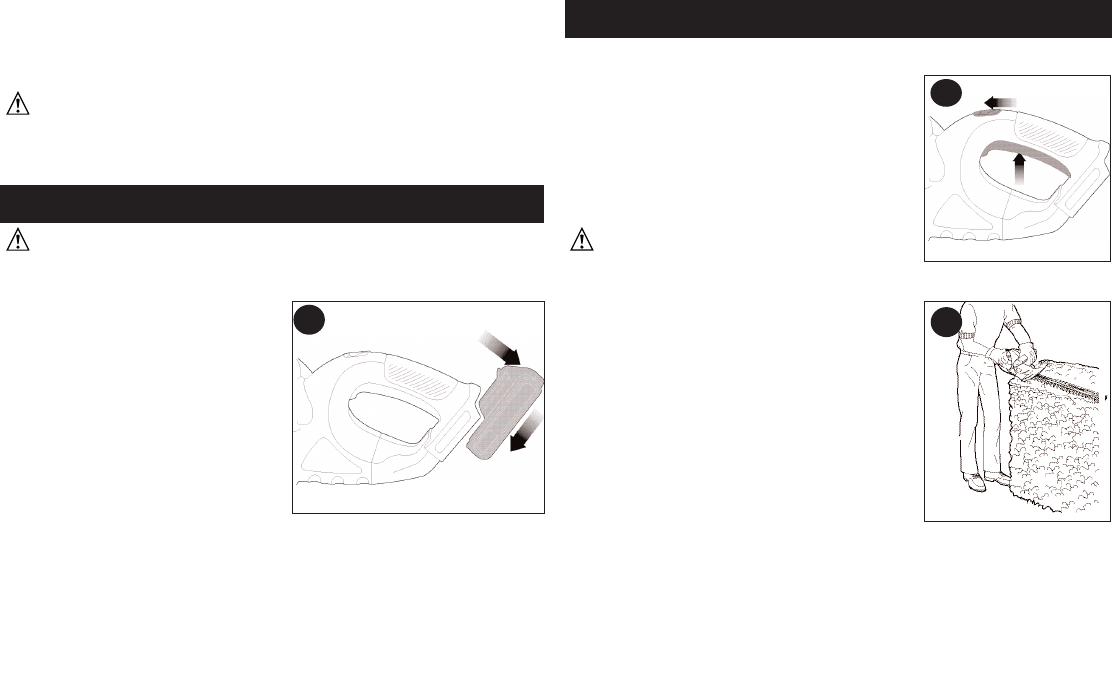
1. WORKING POSITION – Maintain proper
footing and balance and do not
overreach. Wear safety goggles, non-
skid footwear and rubber gloves when
trimming. Hold the unit firmly in both
hands and turn the unit ON. Always hold
the trimmer, as shown in the illustrations
in this manual, with one hand on the
switch handle and one hand on the bail
handle. (figure 4) Never hold the unit by
the blade guard.
8
to, steel wool, aluminum foil, or any buildup of metallic particles
should be kept away from charger cavities. Always unplug the
charger from the power supply when there is no battery pack in the
cavity. Unplug charger before attempting to clean.
6. Do not freeze or immerse charger in water or any other liquid.
WARNING: Shock hazard. Do not allow any liquid
to get inside charger. Never attempt to open the battery pack for any
reason. If the plastic housing of the battery pack breaks or cracks,
return to a service center for recycling.
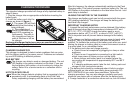
INSTALLING / REMOVING BATTERY PACK
WARNING: Make certain the lock-off button is
engaged to prevent switch actuation before removing or installing
battery.
TO INSTALL BATTERY PACK:
Insert battery pack into tool until an
audible click is heard (figure 2).
TO REMOVE BATTERY PACK:
Depress the battery release button in
the back of the battery pack and pull
battery pack out of tool (figure 2).
2
4
3


Find Your Products By Category
- Photography
- Video Game
- Computer Equipment
- TV and Video
- Communications
- Automotive
- Portable Media
- Marine Equipment
- Cell Phone
- Baby
- Home Audio
- Fitness & Sports
- Power Tools
- Household Appliance
- Car Audio and Video
- Personal Care
- Kitchen Appliance
- Lawn and Garden
- Musical Instruments & Equipment
- Laundry Appliance
- Outdoor Cooking
Please Login
