
0
Owner's of the AT&T Cordless Telephone EL51110 gave it a score of 0 out of 5. Here's how the scores stacked up:


7
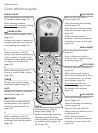
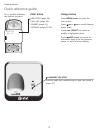
Getting started
Wall mount installation
The telephone base comes ready for tabletop use. If you want to mount your
telephone on a wall, use the provided wall mount bracket to connect with
a standard dual-stud telephone wall mounting plate. If you do not have this
mounting plate, you can purchase one from many hardware or consumer
electronics retailers. Professional assistance may be required to install the
mounting plate.
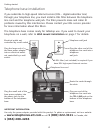
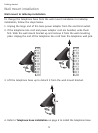
Tabletop to wall mount installation
To change the telephone base from the tabletop installation to wall mount
installation, make sure you first unplug the power adapter from the electrical
outlet and unplug the telephone line cord from the telephone wall jack.
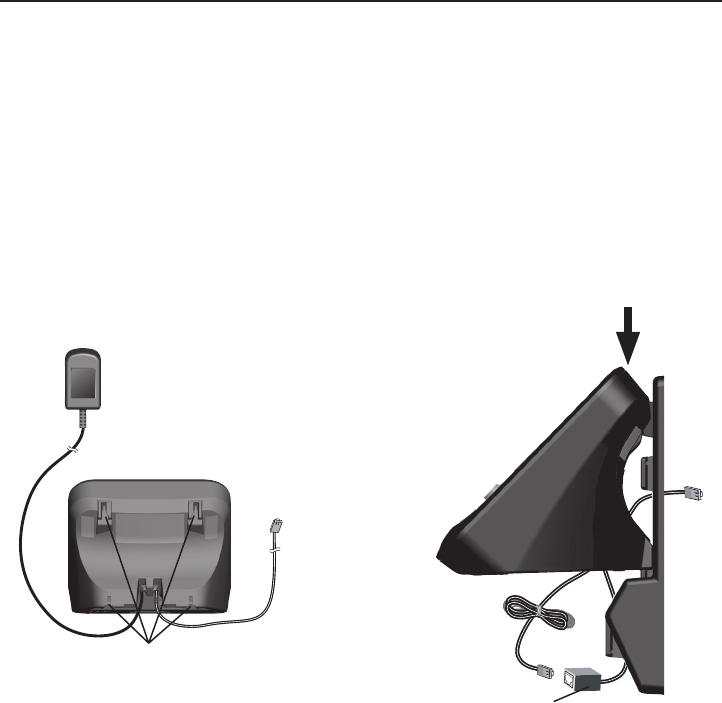
Plug one end of the telephone line cord into the TEL. LINE jack on the
bottom of the telephone base. Plug the small end of the base power adapter
into the power jack on the bottom of the telephone base.
Position the telephone base as shown below. Insert the extended tabs of the
wall mount bracket into the slots on the back of the telephone base. Push
the telephone base down until it clicks securely in place.
Route the telephone line cord through the wall mount bracket hole. Route
the power cord out of the bottom of the telephone.
1.
2.
3.
A DSL filter (not included) is
required if you have DSL high-
speed Internet service.
Slots for wall mount
bracket installation


Find Your Products By Category
- Photography
- Video Game
- Computer Equipment
- TV and Video
- Communications
- Automotive
- Portable Media
- Marine Equipment
- Cell Phone
- Baby
- Home Audio
- Fitness & Sports
- Power Tools
- Household Appliance
- Car Audio and Video
- Personal Care
- Kitchen Appliance
- Lawn and Garden
- Musical Instruments & Equipment
- Laundry Appliance
- Outdoor Cooking
Please Login
