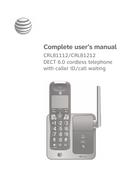

0
Owner's of the AT&T Cordless Telephone AT&T Cordless Telephone gave it a score of 0 out of 5. Here's how the scores stacked up:


6
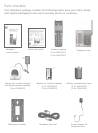
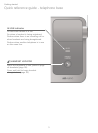
Getting started
Battery installation and charging
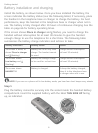
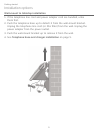
Install the battery, as shown below. Once you have installed the battery, the
screen indicates the battery status (see the following table). If necessary, place
the handset in the telephone base or charger to charge the battery. For best
performance, keep the handset in the telephone base or charger when not in
use. The battery is fully charged after 10 hours of continuous charging. See the
table on page 66 for battery operating times.
If the screen shows Place in charger and flashes, you need to charge the
handset without interruption for at least 30 minutes to give the handset
enough charge to use the telephone for a short time. The following table
summarizes the battery charge indicators and actions to take.
Battery indicators Battery status Action
The screen is blank, or
shows Place in charger
and (flashing).
Battery has no or very little
charge. The handset cannot
be used.
Charge without interruption
(at least 30 minutes).
The screen shows
Low battery and
(flashing).
Battery has enough charge
to be used for a short time.
Charge without interruption
(at least 30 minutes).
The screen shows
HANDSET X.
Battery is charged. To keep the battery charged,
place it in the telephone base
or charger when not in use.
NOTE: If you are on a phone call in low battery mode, you hear four short beeps every minute.
T
HI
S SI
DE
UP
/
C
E
CÔ
T
É
VERS
L
E
HA
U
T
Ba
tt
e
r
y Pa
c
k
/ Bl
o
c
-
pi
l
e
s
:
BT18
3
34
2
/
BT
2
83
3
42
(
2.4V
4
0
0
m
A
h
Ni
-
MH
)
W
AR
NI
N
G
/
A
VER
T
IS
S
EM
ENT
:
DO
N
OT
BU
R
N
O
R
P
UN
CT
U
RE
BA
TT
E
R
I
ES.
NE
PA
S
I
N
CI
N
ÉR
E
R
O
U PER
CER
L
E
S PI
LE
S.
Ma
d
e
i
n
C
h
in
a
/
F
a
br
i
qu
é
e
n
ch
i
ne
CR
13
4
9
TH
IS
SI
D
E
U
P
/
CE
Ba
t
te
r
y Pa
c
k / Bl
oc
-
p
i
les
:
BT18
3
3
42
/
B
T
2
8
33
42
(
2
.4
V
400m
A
W
AR
NING
/
A
VE
R
TI
SS
E
ME
NT
DO
NO
T
BUR
N
O
R
PUNC
T
NE
P
AS
I
N
C
INÉRE
R
O
U
Ma
d
e
i
n
Ch
i
n
a /
Fa
br
i
HD
A
U
D
IO
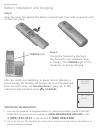
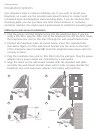
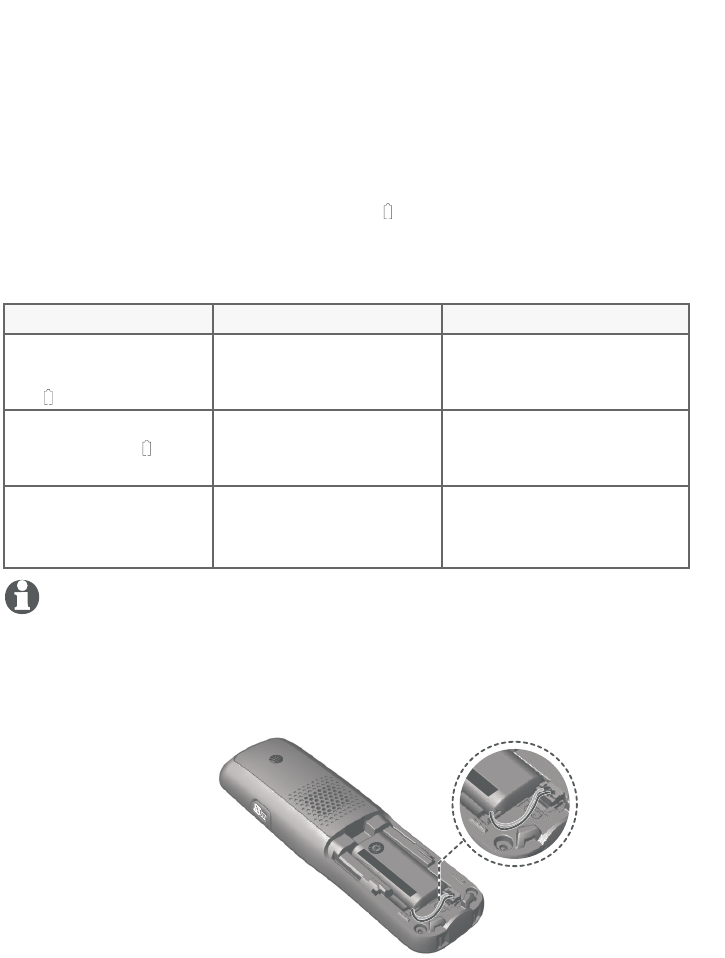
Step 1
Plug the battery connector securely into the socket inside the handset battery
compartment. Insert the supplied battery with the label THIS SIDE UP facing
up, as indicated.


Find Your Products By Category
- Photography
- Video Game
- Computer Equipment
- TV and Video
- Communications
- Automotive
- Portable Media
- Marine Equipment
- Cell Phone
- Baby
- Home Audio
- Fitness & Sports
- Power Tools
- Household Appliance
- Car Audio and Video
- Personal Care
- Kitchen Appliance
- Lawn and Garden
- Musical Instruments & Equipment
- Laundry Appliance
- Outdoor Cooking
Please Login
