

0
Owner's of the 3M Projector MPro150 gave it a score of 0 out of 5. Here's how the scores stacked up:


3M
™
Pocket Projector MPro150
48 © 2010 3M. All Rights Reserved.
English
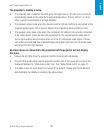
Troubleshooting
The projector will not turn on.
• The battery is not properly installed, or the power adapter is not connected to the
projector and a working wall outlet. Test the electrical outlet by plugging another
electrical device (like a radio) into the wall outlet to confirm that the wall outlet works.
• The battery is installed in the wrong orientation. See “Install Battery” on page 11.
• Attempt to remove and replace the battery.
• Hold down the power button until the projector powers up.
The status indicator is flashing red when the power button is held down.
• The battery needs to be charged or reinstalled. See “Charge the Battery” on page 13.
The image is not visible or is very dim.
• The 3M MPro150 projector is a battery-operated device and requires controlled lighting
conditions. The image may appear very dim in brightly lit rooms.
• Make sure the status indicator is green. This indicates that the projector is powered on
and projecting an image.
• Project the image onto a flat, white surface.
• Decrease the light on the surface where the image is being projected.
• Decrease the size of the image.
• When there is nothing connected to the projector, it will project the home screen.
The projector is displaying a question mark.
• The projector does not support the video or computer input signal. Switch to a signal that
the projector supports. See “Supported Computer Signals” on page 51.
A computer is connected to the projector but the projector will not display the
computer’s image.
• Unplug the VGA-audio cable from the projector and the home screen will display.
• Plug the VGA-audio cable into the projector and the icon in the upper-left corner of the
image will display the “VGA-Audio cable” icon. See “Video Mode Icons” on page 21.


Find Your Products By Category
- Photography
- Video Game
- Computer Equipment
- TV and Video
- Communications
- Automotive
- Portable Media
- Marine Equipment
- Cell Phone
- Baby
- Home Audio
- Fitness & Sports
- Power Tools
- Household Appliance
- Car Audio and Video
- Personal Care
- Kitchen Appliance
- Lawn and Garden
- Musical Instruments & Equipment
- Laundry Appliance
- Outdoor Cooking
Please Login
