

0
Owner's of the 3Com Switch 5500-EI gave it a score of 0 out of 5. Here's how the scores stacked up:

Rack-mounting 33
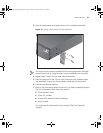
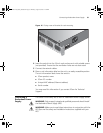
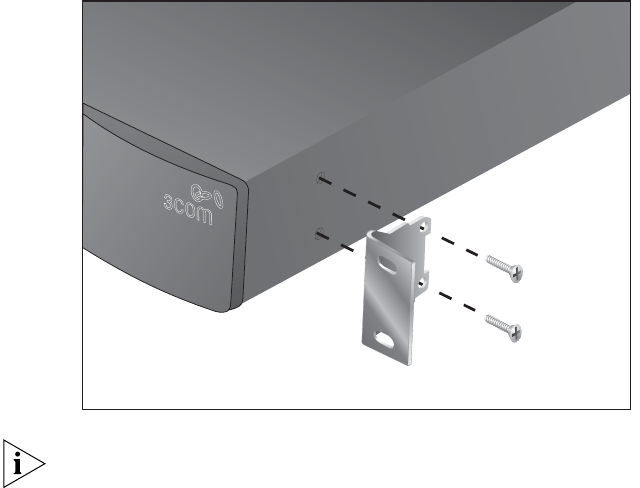
3 Insert the two screws and tighten them with a suitable screwdriver.
Figure 15 Fitting a front bracket for rack-mounting
You must use the screws supplied with the securing brackets. Damage
caused to the unit by using incorrect screws invalidates your warranty.
4 Repeat steps 2 and 3 for the other side of the switch.
5 Insert the switch into the 19-inch rack and secure with suitable screws
(not provided). Ensure that the ventilation holes are not obstructed.
6 Connect the network cabling.
7 Place a unit information label on the unit in an easily accessible position.
The unit information label shows the switch’s:
■ 3Com product name
■ 3Com 3C number
■ Unique MAC address (Ethernet address)
■ Serial number
You may need this information if you contact 3Com for Technical
Support.
10014925-AD_S5500_GSG.book Page 33 Thursday, August 16, 2007 12:29 PM


Find Your Products By Category
- Photography
- Video Game
- Computer Equipment
- TV and Video
- Communications
- Automotive
- Portable Media
- Marine Equipment
- Cell Phone
- Baby
- Home Audio
- Fitness & Sports
- Power Tools
- Household Appliance
- Car Audio and Video
- Personal Care
- Kitchen Appliance
- Lawn and Garden
- Musical Instruments & Equipment
- Laundry Appliance
- Outdoor Cooking
Please Login
